In this introductory guide, we’ll delve into the default node-based workflow of ComfyUI. This standard workflow is what you see upon opening ComfyUI for the first time, and it offers a fundamental insight into the software’s operation and its core features. The guide is designed to help you create your first image and gain a solid understanding of the functions of different nodes, building your confidence in using the software effectively.
Introduction of ComfyUI
ComfyUI is a node-based user interface specifically designed for generating AI images and animations using Stable Diffusion. Gaining popularity in 2023 as an alternative user interface to Automatic1111, ComfyUI stands out for its flexibility and user-friendly design.
The node-based layout of ComfyUI streamlines the creation of custom AI-generated images and animations. However, for someone new to the system, this node-based approach might initially seem daunting. This is exactly why I have written this guide to slowly introduce you to it. Additionally, its compatibility and free-to-use nature alongside Stable Diffusion further enhance its appeal to those interested in AI-driven creative processes. This tool appears to be particularly favoured by users who prefer a more intuitive and customizable interface for their AI image and animation generation needs.
Table Of Contents
- System Requirements and Installation
- ComfyUI Default Layout
- Understanding the Nodes in ComfyUI
- Resources for Learning and Inspiration
- Loading Checkpoints
- The CLIP Text Encode (Prompt) Nodes
- KSampler Node in Depth
- Denoising and Scheduler Nodes
- VAE Decode Node
- Saving Your AI Image
- Preview of the Next Guide
System Requirements and Installation:
- NVIDIA Graphics card
- 12GB of VRAM
For Mac users please see here. I have made a installation video here : Ultimate Guide to Seamless AI Animations (Even on Low-End PCs!) – YouTube
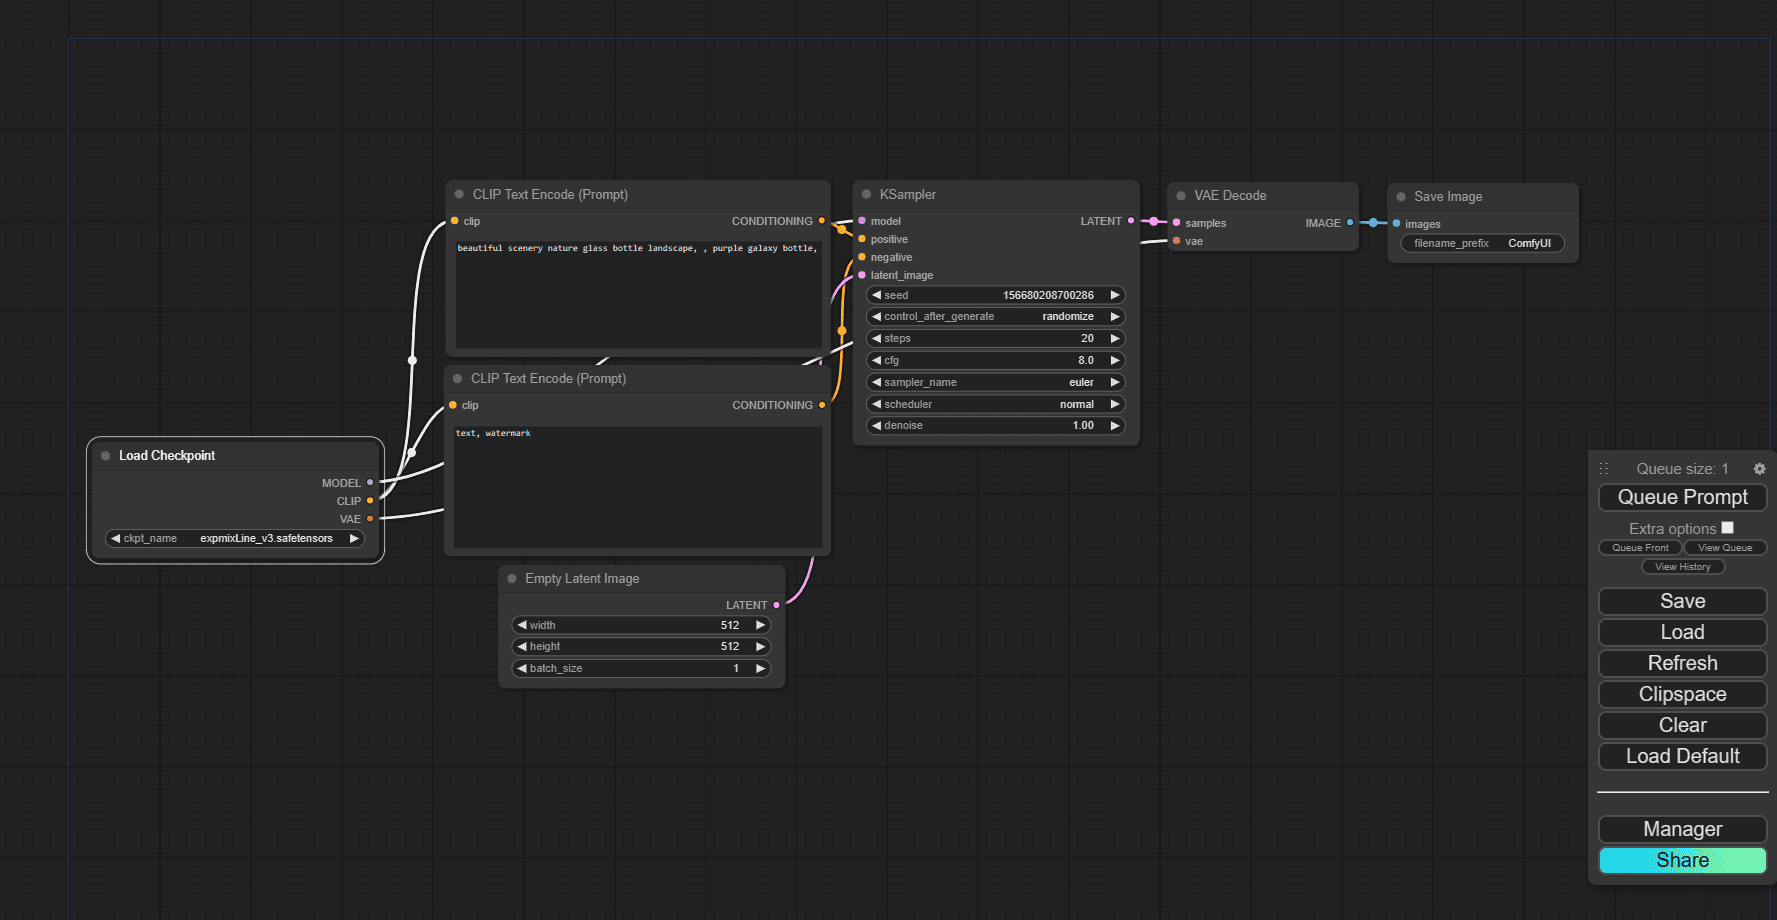
ComfyUI’s user interface is built around nodes, each serving a distinct function. Upon opening ComfyUI, you’re greeted with a blank workspace. To activate the default interface, which includes a pre-connected set of basic nodes, click the ‘Load Default’ button as shown in the accompanying image. This action will display a network of fundamental nodes, arranged from left to right. For installation of ComfyUI please refer to this video.
What do all the nodes do?
ComfyUI’s versatility is showcased by its wide range of node sequences, each tailored to create specific types of AI images or animations. This flexibility allows users to experiment and find the best node combinations for their creative projects. The ComfyUI community actively contributes to this diversity by constantly creating and sharing new workflows.
The Stable Diffusion Reddit forum is an excellent resource for both beginners and those looking for creative inspiration. In this forum, users engage in sharing ideas, tips, and various workflows related to Stable Diffusion. While the forum isn’t exclusively focused on ComfyUI, it remains a valuable source of information and community support for users interested in all aspects of Stable Diffusion, including those using ComfyUI. This collaborative environment can be especially helpful for learning, troubleshooting, and discovering new techniques in image and animation generation with AI.
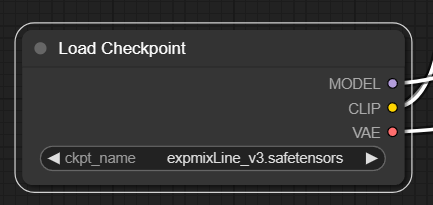
Load Checkpoint
The first node on your default layout is the load checkpoint node. A checkpoint file is essentially pre-trained model focusing on a style or genre. The type of images a model can create is determined by the dataset it was trained on. This dataset could focus on general imagery or be specialized in a particular genre or style. Please be aware that many checkpoint files cannot be used for commercial use. Also it’s worth noting if the checkpoint file was made for Stable diffusion 1.5(an earlier version of stable diffusion or SDXL – the latest version. CivitAI is a great source to download checkpoint files Civitai: The Home of Open-Source Generative AI .
The CLIP Text encode(Prompt)
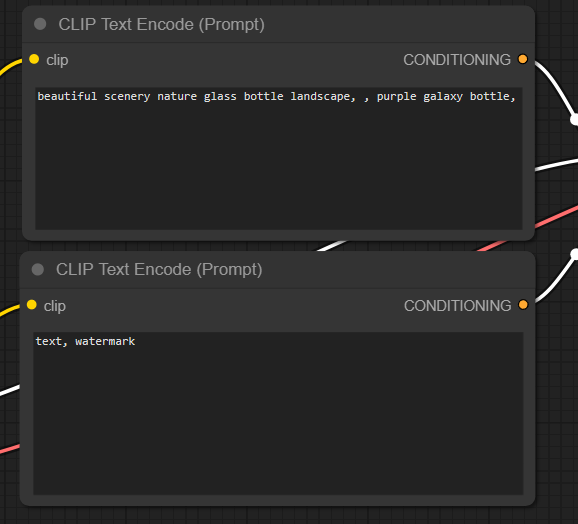
There are two of these nodes, you will notice that one will connect to the KSampler Postive and one the negative. They are simply your positive prompt and negative prompt.
Positive Prompt: The positive prompt guides the AI towards what you want it to draw
Negative Prompt: The negative prompt specifies what you want the AI to exclude from the image
KSampler
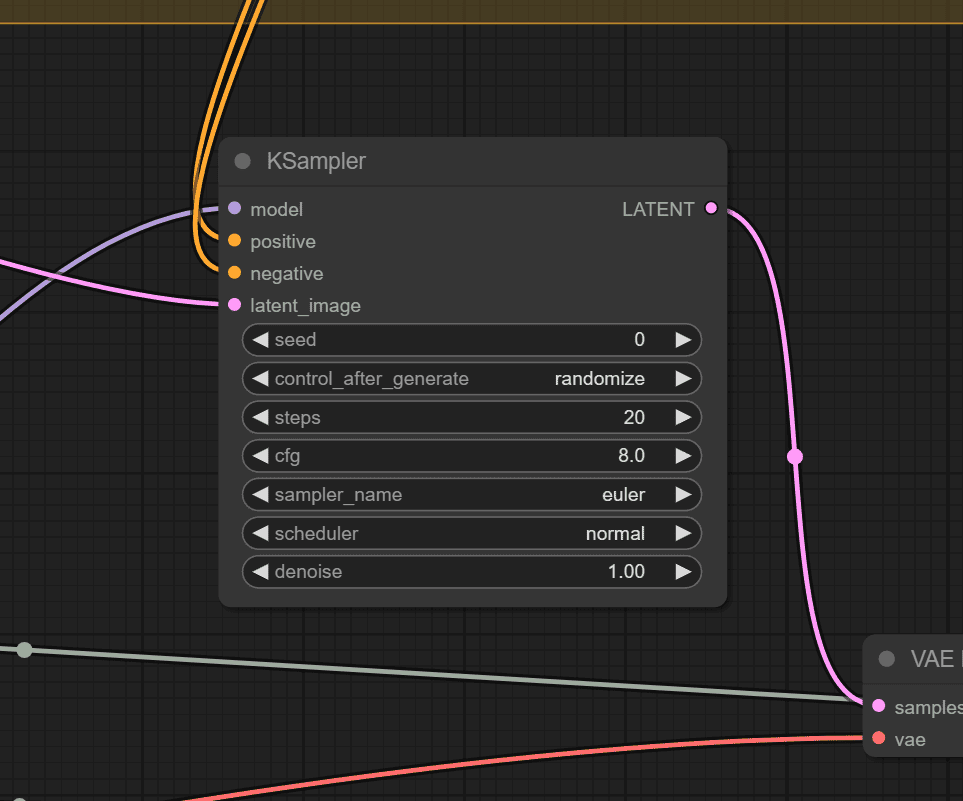
The KSampler lets you have control over the image process
This node has different options for both input and output to control how it processes the image.
Seed: The seed value is the initial random input used in the latent space to start the image generation process. Essentially, it determines the content of the image, with each generated image having a unique seed value.
Using the same seed with produce similar results.
Steps: Generally, a higher number of steps allows more time for refining the image generation, leading to better quality. However, using too many steps can adversely affect the image.
CFG: The CFG value emphasizes adherence to the prompt in the image generation, but excessively high scale settings can detrimentally affect image quality.
- Sampler Name: Various samplers impact how fast, how well, and how varied the image creation process is. Different samplers offer distinct results in these areas.
Example of different samplers that cna be used in ComfyUI and Automatic 1111:
Euler a, Euler, LMS, Heun, DPM2, DPM2 a, DPM++ 2S a, DPM++ 2M, DPM Fast, DPM Adaptive, LMS Karras, DPM2 Karras, DPM2 a Karras, DPM++ 2S a Karras, DPM++ 2M Karras, DDIM, PLMS etc
- Denoise: The Denoise strength setting, ranging from 0 to 1, determines the similarity or difference between the output image and the input image. A setting of 0 adds no noise, meaning the output will be exactly the same as the input.
- Scheduler: The Scheduler controls the frequency and intervals at which the sampling process is repeated. Different Schedulers can impact the quality and variety of the generated images in various ways.
VAE Decode Node
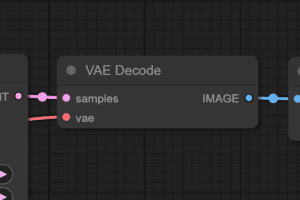
There is no need to adjust anything with the VAE decode, this node is there to automatically convert images from latent space back into pixel space, utilizing the specified Variational Autoencoder (VAE). This process essentially transforms the abstract, encoded representations of images in latent space into visible, regular images in pixel space.
Save Image
This is the last node on the default workflow and where you AI image will appear. In the next guide I will show you how to add video outputs to your node base layout.
Conclusion
As demonstrated, generating an image with ComfyUI is more straightforward than it might initially appear, and this guide aims to boost your confidence in using the tool. While some workflows may seem complex at first glance, they become much simpler once broken down and explained. In upcoming guides, I’ll delve into additional node workflows, specifically focusing on video-to-video transformations. These will enable us to alter the style of a video using some of ComfyUI’s advanced nodes. Stay tuned for more insights and tutorials. Until next time…
