In this tutorial, we will learn how to train Stable Diffusion with images that currently do not exist. This means you can create any character and train AI to recreate that character in any environment you can imagine.
Things you will need:
- Google Colab Pro ($8 a month, cancel anytime) https://colab.research.google.com/signup Google colab pro will work as our computer, so you do not need any fancy PC to do this. We will be running this all on virtual machines (It’s super easy!)
- Stable Diffusion (AUTOMATIC 111 UI)Automatic 1111 has developed a user interface that can now be installed and run locally on your machine. You need at least 4gb of VRAM to run this, otherwise, you will get out-of-memory errors. But do not fear, I will be bringing a new tutorial that enables you to run stable diffusion remotely without sign up here to find out when it’s released.
Step 1: Character Design
Log into Midjourney. You can use any Text to image generator. It’s just in this tutorial I so happen to be using Midjourney.
You can use any text to image generator you like, I just chose Midjourney as an example. When you log in, find a suitable room on the left-hand side or make your own. In the bar at the bottom type in /settings You can use any of these settings displayed, but again for the purpose of this tutorial, I will be using Midjourney version 4. I switch the Remix feature on as well to get my character close to what I have in mind. See here for more about the remix feature.
My prompt is:
/imagine head and shoulders shot of Instagram model, orange long hair, hyper detailed –v 4

My aim is to get the character facing forward. In order to get your character facing forward, you can include in your Prompt looking straight on, looking at camera, symmetrical face.
Do not be afraid to use the remix button to adjust your character.
Step 2: Make a video
The video we need to make is called a Driving video. Think if it like Texas chain saw massacre. We will be taking our characters skin and putting it on top of our animation.
You can use any face (Male/female) to use as driving video, it does not matter. What does matter is that you show an array of facial expressions. Sad, happy, confused, shocked. Also be aware not to turn your head too far left and right, but if you do you can just delete those frames later on- so no biggie.
I used my iphone, you can use webcam or what ever you have to hand.
- Make sure your video is relatively short (Under 10 secound. Mine was under 20 seconds, and 9.78 mb)
- Save your video as driving.mp4 & and your characters face image as source.png
- You can use https://ezgif.com/to crop and resize your video to 401×412 Pixels
- I matched my characters face and my face in the video up in After effects by just moving it around in place, so the eyes, chin and mouth were roughly in the same place.
Step 3 : Google Colab -Thin Plate Spline Motion
So if this is your first time using google colab, welcome. And if you are a regular user, you probably know more than me. But I think we can all agree to a newbie this looks daunting, it’s not. Use the FAQ and comments section if you have any question about this, I’ll be happy to help.
I advise signing up for the google Pro account, as you will be allocated better GPU and more RAM. Otherwise you may run into out of memory errors. Once you have made an account with google colab.
- Open the Thin Spline plate motion model notebook and make sure you are signed in.
- Click on the play button. This will run the cell which installs everything you need remotely on your computer.
- You will get a message letting you know this is not authored by Google, click Run anyway
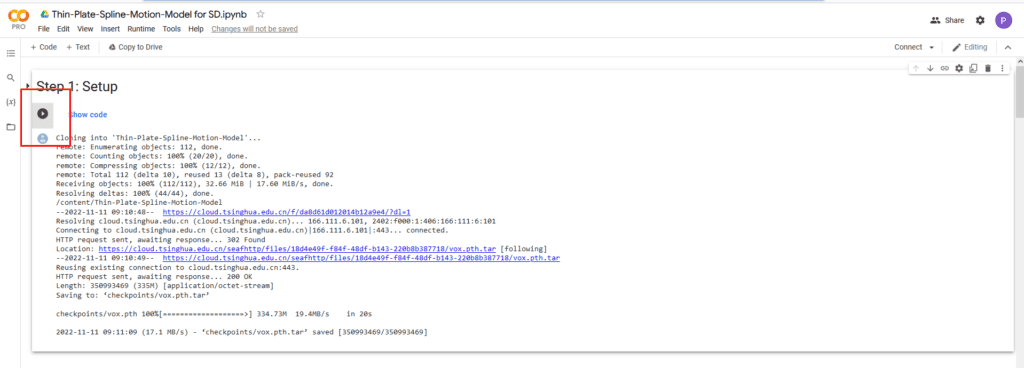
- Once a cell has executed successfully you will see a tiny green tick next to the button.
- We now need to upload our driving.mp4 and source.png.
- This easiest way to do this is to mount your google drive to this notebook (But I understand for security reasons if you do not want to do this. Please refer to the FAQ here for an alternative method here.
- Click the files icon to the left of the screen. This will expand you file panel out.
- Click on Mount drive icon, as seen in image below
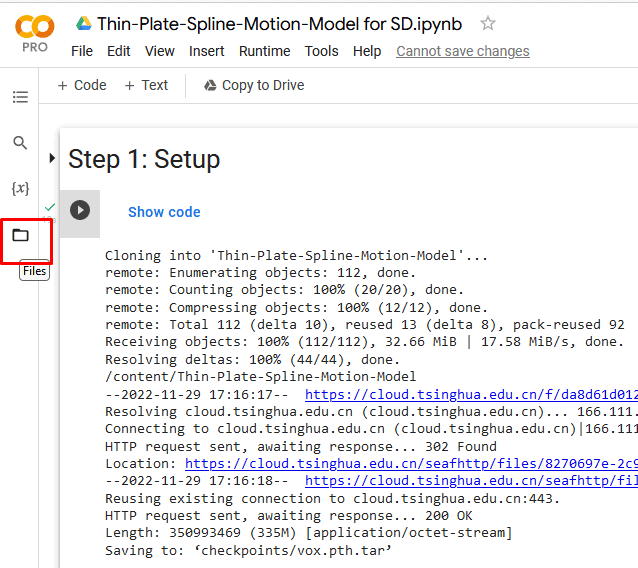
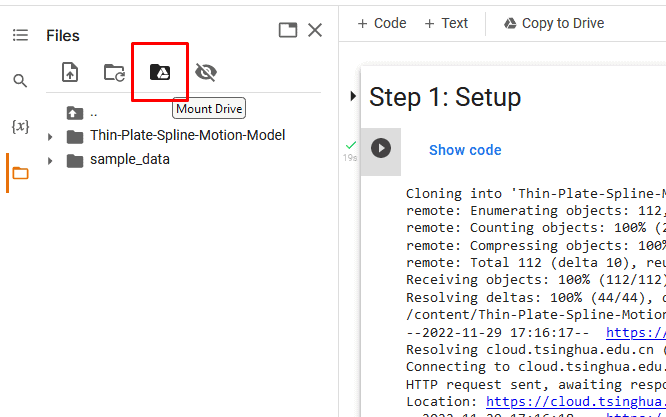

- Once you have clicked the Mount drive icon, a new cell will appear in your code section of you notebook. Click run (The play icon)
- You will now be asked to connect your google drive to this notebook. Click connect to google drive, and log into your google drive.
- Once this cell has sucessfulyl excuted, you should now see a new file appear in your files panel on the left hand side (Might take a few secound to appear. If not you can press the go up a folder icon, this will refresh your folder list. Now navigate to: Content > Thin-plate-spline-motion>Drive
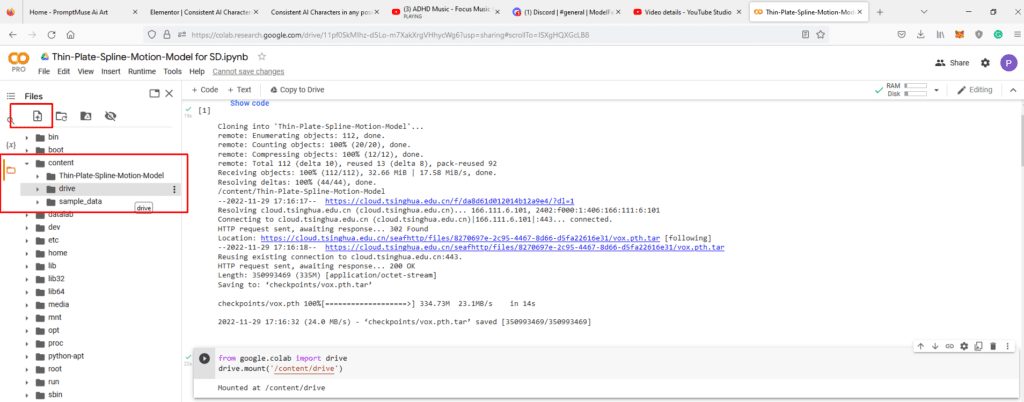
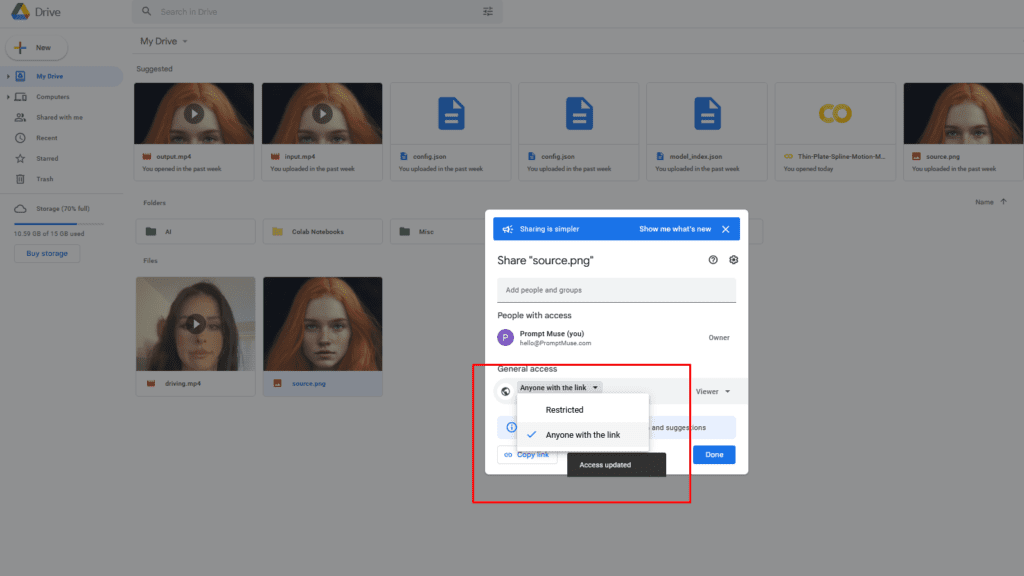
- Now, go back to you google drive in Drag and drop your driving.mp4 and source.png into your google drive folder making sure it’s not in a folder. Right click on each file and click Get link. On the general access drop down select Anyone with Link and then Done.
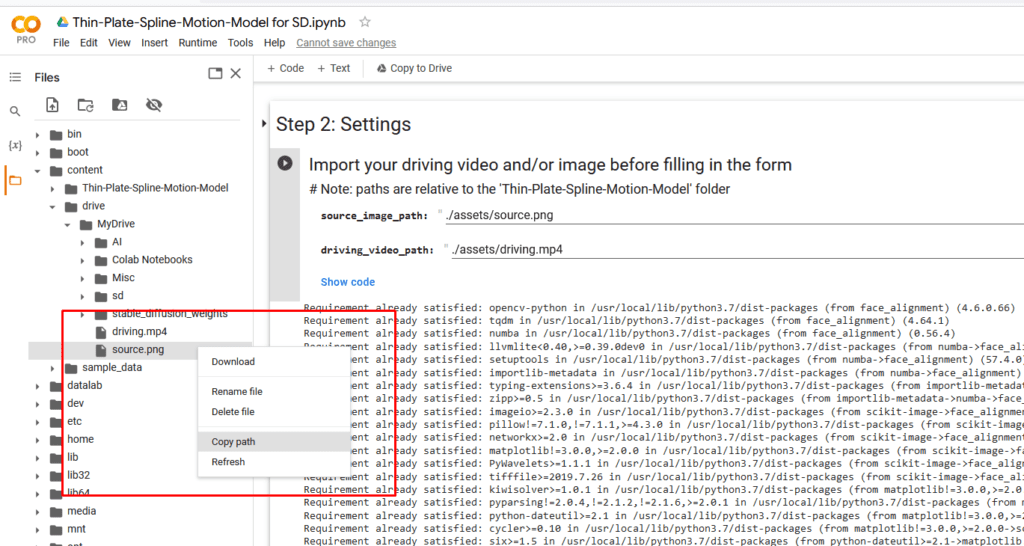
- Navigate back to your Thin Plate Spline notebook and Right click on your driving.mp4 (Located in the left hand file structure) and click Copy Path
Paste the path into Step2 settings,
source_image_path:
/content/drive/MyDrive/source.png
driving_video_path:
/content/drive/MyDrive
Run cell Step 2

- The next steps are easy, just run the cells in order and wait for them to complete before moving onto the next cell
- Once all cells are complete you will have all you assets that you have created saved in the folder structure on the left hand side. All you now need to do is download the up scaled frames. Save about approx 20 of the best frames, showing various facial movements.
Step 4 : Outpainting
Hey, I’m just finishing this documentation up, so bare with me whilst I work on it. The rest of the tutorial Should be up within 24hours



5 Comments
Amazing work! A complete workflow like this is rare (actually the only one I’ve seen and I saw the original reddit post by the guy who posted about this). I was attempting the same thing when dreambooth first came out, but had issues locally installing thin-plate-spline (I had the idea after watching Nerdy Rodent’s videos). At that time I didn’t know of any colab’s, so gave up. Sooo, back to it I guess :). Awesome work. I hope you never lose your passion for it!
Thank you for this.
What aspect ratio should the source.png file be?
Cell 3 refers to a demo module, which does not exist. Where would one get that module?
I’ve run the Thin Plate Spline colab a few times now (tried different source images in case they were the issue) and I can’t get it to track the mouth movements – The output steadfastly keeps the mouth of the model closed, even when my driving video has very distinct open mouth, teeth showing (grins, etc), vowel and syllable movements. What am I missing?
Great video. Unfortunately, Colab’s version is really buggy and quite low quality in terms of tracking most movements. Possibly it’s because I wasn’t using a photorealistic image but a graphic novel style image.