Introduction: The Power of AI in Animation
AI-generated animations are becoming increasingly popular in the creative world, and it’s no wonder why. These powerful tools allow artists to quickly and easily create stunning visuals that would otherwise take hours or even days to produce. In this comprehensive guide, we’ll walk you through the process of creating your own AI-generated animation using state-of-the-art techniques, tools, and workflows. With the help of this tutorial, you’ll be well on your way to producing professional-quality animations in no time.
Preparing Your Data for Training
Before diving into the animation process, it’s essential to prepare your data for training. Here’s a step-by-step guide to help you get started:
Gather a diverse dataset: To train your AI model effectively, you’ll need a large and varied dataset. This can include a mix of images, videos, and other visual content.
Preprocess your data: To ensure your AI model can effectively learn from your dataset, you’ll need to preprocess your data. This can involve resizing images, removing any unwanted artifacts, and normalizing the data.
Split your dataset: Divide your dataset into a training set and a validation set. This will allow you to train your model on one set of data while validating its performance on another.
How I Unleashed the Power of AI to Create Next-Level Animations
Once your data is ready, you can begin the process of training your AI model.
Training Your AI Model with Google Colab
Google Colab is an excellent platform for training your AI model, as it provides a powerful and user-friendly interface. Follow these steps to train your model using Google Colab:
Upload your dataset: Import your dataset into Google Colab, either by uploading it directly or connecting to your Google Drive.
Configure your training settings: Adjust the learning rate, optimizer, and other settings to optimize your model’s performance.
Train your model: Run the training cell to begin the training process. This may take anywhere from 30 to 40 minutes, depending on the size of your dataset and the complexity of your model.
Throughout the training process, be sure to monitor your model’s performance by checking its progress in the Google Colab interface.
Once your model has completed its training, you can export it for use in your animation project.
Creating and Animating Your 3D Character
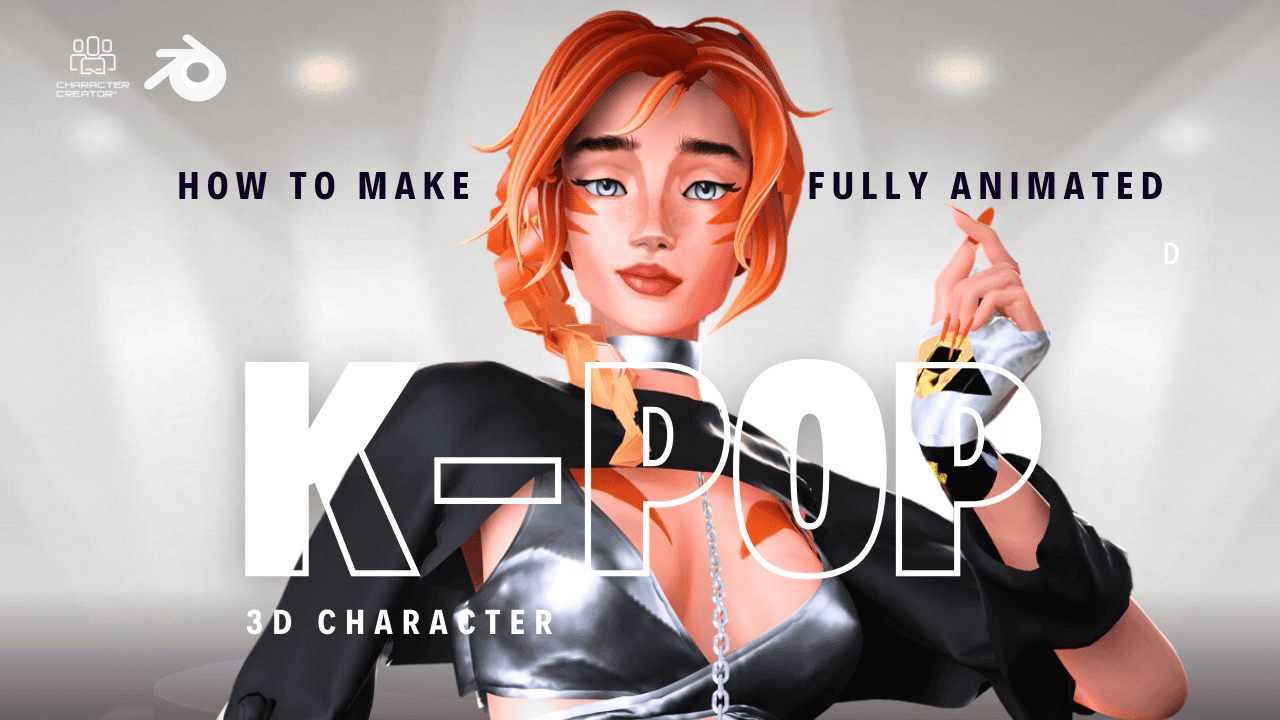
Now that your AI model is trained, it’s time to create and animate your 3D character. Here’s a step-by-step guide to help you bring your character to life:
Generate an image of your character: Use a tool like Automatic 111, Run Pod, or CalicuristroC Lab UI to generate an image of your character using your trained AI model.
Create a 3D model of your character: Import your generated image into a 3D modeling program like Headshot or iClone, and use the built-in tools to create a 3D model of your character.
Add hair and other details: Use the libraries and tools provided by your 3D modeling program to add hair, clothing, and other details to your character.
Animate your character: Use a plugin like Motion Live to record your facial movements and apply them to your 3D model in real time. This will create a realistic, lifelike animation of your character.
Once your character is fully animated, you can export it for use in your final project.
Rendering and Finalizing Your AI-Generated Animation
After you have completed setting up your animation, it’s time to render and finalize your AI-generated creation. With the right settings and techniques, you’ll be able to produce smooth and realistic animations.
Batch Rendering Frames
To create a frame-by-frame animation, you need to batch render your frames. To do this, head over to the “Batch” tab in Automatic 111, select the input folder where your 3D files are stored, and the output folder where you want the rendered frames to be saved. Then, click on “Generate.” Once the rendering is complete, you will have a seamless animation that can be easily combined and edited in post-production software.
Post-Production and Final Touches
After rendering your animation frames, import them into a post-production software like Adobe After Effects or Da Vinci Resolve. Apply the appropriate effects, such as dirt removal and deflicker, to ensure a smooth and polished final result.
Remember that you can experiment with different checkpoint models in Automatic 111 to quickly change the render style of your animation. This flexibility allows you to create a variety of looks and styles with just a few clicks.
Sharing Your AI-Generated Animation and Continuing to Learn
Once your AI-generated animation is complete, be sure to share your work on social media and tag Prompt Muse so they can see and appreciate your creative projects. Connect with others in the community and continue learning from their techniques and ideas.
Join the Prompt Muse Community
Get involved with the AI creative community by following Prompt Muse on social media. You can find them on Instagram and Twitter as @PromptMuse. Additionally, join their Discord server to engage with other AI enthusiasts and share your projects.
Stay Up-to-Date with the Latest AI Tech News
To keep up with the latest developments in AI technology, subscribe to the Prompt Muse newsletter. You’ll receive regular updates on cutting-edge techniques and tools that can help you push the boundaries of your AI-generated animations and other creative projects.
Creating AI-generated animations is an exciting and ever-evolving field. By following the detailed steps and techniques shared by Prompt Muse, you can create stunning and realistic animations using AI technology. Experiment with different settings, checkpoints, and tools to discover new possibilities and unique styles for your projects.
Remember to share your creations with the AI community and tag Prompt Muse on social media, as they are always eager to see and celebrate the innovative work being done in this space. Stay connected, keep learning, and continue pushing the boundaries of AI-generated animation.
TRANSCRIPT:
And welcome back to another prompt muse tutorial. Today, I’m going to be showing you how to create a fully animated AI character. The beauty of this technique is that you don’t have to act out the scenes before. In fact, you don’t need to look like your actor or your actress. This method could potentially be used in the movie industry. If not just the concept artwork, it could be used for an entire movie itself. For this tutorial, I’m going to be training a realistic data set for my puppet. I’m going to be using myself so you can judge the likeness at the end for yourself. I gather up loads of images of myself. I then train it with Koya Laura. Then once I’ve done that, I use Character creator to create a puppet. You do not need to know any 3D. There is no learning curve to this software. You’re basically using sliders and dragging and dropping assets onto your 3D character. It is super simple to use. Obviously, you can go down the blender routeand the meta human route if you want to, but I just warn you, there is a learning curve, so it’s up to you what you want to do.
But my workflow is through character creator. This means I can then switch out to any character using the data set. So once I’ve got those rendered files of my puppet, I can then switch out those data sets from one character to another, and it’s a really easy and efficient way of working. So let’s dive in and get on with the tutorial. Step one, preparing your training images. I’ve prepared various images of myself. Put some images that are more like you, rather than photographs with a filter on, because trust me, it works ten times better. If you do that, you will get the likeness a lot better. It’s important that you choose your head, your body, some full bodies in there, some close up, some far away. You need to ensure that your hairstyles are quite different in each image, that you’re taking from different profiles, that your background’s changed, that your outfit’s changed. If you put too many headshots into your training data, you end up with things like this. Because the AI doesn’t know what the body is, so it gets confused. You need to put some body shots in there. I’m using a website called Burmy, which is absolutely free to use and it crops your images down to the size you want.
I’m going to be using 512 by 512 because that’s pretty much my resolution. You can go up to 768 by 768, but remember that’s going to use more VRAM and take longer to train. Once I’ve done that, I want to rename all my files. So click on Rename and just put X in the box and Save as Zip. And that will save all your files in numerical order. So 1. Png, 2. Png, because that’s how you want it. Head over to Google Drive and simply save your zip file there. Step two, training your data set. I’m using the Linquf Quia Laura Dream booth. We are going to make sure that we’re logged into our Google account here, and then we’re going to press Connect here. So once you’ve done both of those, we can start the training. Simply come down to step one. All we need to do is check the Mount Drive button and run that cell. And this is going to mount your Google Drive. I’m going to click Connect to Google Drive. It’s going to give you some warnings about connecting to an unGoogle offered notebook. Now that’s running. Once that’s completed, you’ll get a green check next to it.
So this downloads all the dependencies into your file structure over here. Now, remember, this is remote. This isn’t on your PC. So once you come out of here, you’ll lose everything. But this is where we connect the Google Drive so we can pull files across from our Google Drive. And then once we’re finished, we can take the train model and export that to our Google Drive. So we’re just going to come down here, the 1.2 Open Special Fire Explorer. Ignore that, that’s fine. We don’t need to do that. The default setting here is for anything version 3, which is more of an animation style model. And if you click here, there’s a few more preloaded links in there. If I click on Stable Diffusion 1.5, that’s good for me because I’m doing a realistic character. I just want to chip in and say the Stable Diffusion 1.5 base model is a good all rounder training file to use. Obviously, you can use whatever you want, but if you’re starting off, this is a good one to learn with. You can see in this bit below, you can actually load in your custom model, which means you can go to the hugging face link.
For example, a good model to use is Realistic Vision 2. So you get the Hugging Face link for your model and place it in there and run that cell. But we’re not doing that for this tutorial. So I’m just going to leave the space underneath, which is Stable Diffusion 2Model Blanks. We’re not going to be using that. And then just ignore 2.2. We’re not going to be running our own custom model. So 2.3 download available VAE. Sometimes you might notice when you switch models in automatic one on one or whatever program you’re using, that the images are really desaturated and lost their colours. That’s usually down to the VAE not the not being detected or being corrupted. So we are going to load in the Stable Diffusion 1.5 VAE, which is already there. So it’s a Stable Diffusion VAE, and that’s going to, again, just download it all into our file structure. And then we’re just going to hit on Run on there. And then we come down to 3.1 locating train data directory. So this is going to create some file path to where our train data file is. And that’s where all our input data set images, so my face images, will be going into that folder.
And don’t worry, you don’t have to do anything. It does it automatically for you. So I’m going to hit run on that cell once again, and it says your trained data directory. So if we go and have a look, so expand the Laura down here. By the way, if you don’t have this open, it’s this folder here to go into here. Now, go to Laura and you’ve got your regularisation data and your trained data. Do not drag and drop your images into here. Wait, we’re going to be doing that automatically. On to 3.2 unzip data set. So this zip file underscore URL. So this is why we zipped our file up and put it onto our Google Drive because we’re now going to grab it. So if you go to Drive, this is essentially your Google Drive, my Drive. And then I’m going to come down and find my zip file, which is 100 prompt muse images. Zip. I’m going to click on the three dots there and copy path. And then I’m just going to paste in the top zip file underscore URL. I’m going to leave the unzip, underscore, two blank. I’m just going to close this hierarchy here so we can see what we’re doing.
And you can see there it’s extracted all my files from that zip file into that new folder. So we’re going to come down to 3.3, which is the image scraper. Again, I’m not going to use this. This is based on more or less animation databases. So what it does is scrape regularisation images, which I don’t want to do because I’m not using animation. So I’m going to ignore this. But if you are using animation, you can do it here, ignore 3.3. Data clearing. This is to do with the cell above it. You’re scraping all these images, you might not be aware what they actually are. There will probably be some in there, but hopefully… No, don’t do that. And the convert transparency images. Well, it says what it does. So if the image has a transparent background, that’s very hard for machine learning. So you want to convert that and also random colours as well. So you check that if you’re doing the animation and scraping the images, which we’re not going to do. Okay, so let’s go down to 4.2, which is data annotation. We’re going to be using a blip captioning, which is tagging images with a description.
This is used for realistic imagery. The one below it, which is the way through diffusion, is used more for animation. So we’re just going to be using this blip captioning over here. here. So I’m not going to change any of these settings. I’m going to leave them as default and run that cell. What that will be doing is reading the input images that I put into the Google collab. It’s then going to be describing what it sees in the images. Everything it needs out of the description is what it’s going to train upon. So it’s going to describe my microphone and the fact that I’m wearing a necklace or potentially a brown top. This means it’s not going to train upon those things, which makes it so much easier to create a way more flexible model when I’m generating the images later on. So I’m not stuck in this room with this necklace and a brown top on. So to show you what I mean, I’m just going to show you the files it created. So if you come to your files, Laura, and then expand on train data, you can see it’s generated these caption files here.
So if we just pick any image here, 13, and you can see I’ve got a microphone and a necklace, so it should pick up on those attributes. So I’m going to click the caption that goes along with that image. And yeah, it said a woman sitting in a chair holding a microphone. So it’s actually that. Now I can actually add on to this and add necklace if I didn’t want it to train on me wearing a necklace, but I like my necklace and yeah, it’d be good to have that in the model as well. So you can edit these further if you want to. But for this tutorial, I’m not going to do that. I’m just going to leave it as is. I’m just going to close those images there and close that window. I’m going to ignore the way for your diffusion tagger. As I said, that’s for anime, and I’m going to ignore the custom caption tag. This creates you a text file caption, which again, I’m going to ignore that. Now we’re onto training model. So in 5.1 model config. So if you’ve used StableDiffusion version 2 to train your model, you need to check these two boxes here.
I haven’t. I’ve used Stable Diffusion 1.5, so I’m going to leave those unchecked. Under the project name, give your project name as something that you will remember. So I’m going to just call my imprompt tutorial. And then underneath it, you’ve got pre trained model name all. So I need to change this to my Stable Diffusion trained model. We downloaded all these dependencies in the first cells. This would have made you a pre trained underscore folder. So if you just expand that, and then within there sits your saved Hensers model. So if you go with the three dots, click on it, copy path, and simply just paste that in there. So we have the VAE, so the VAE file, which controls the color in your images. So we also need to grab that and that would have installed during the first sell as well. So that will be in the VAE folder. So repeat that process, copy that path and just simply paste it in there. Now, this is where it’s going to be saving your finalized models. And I say models because it’s going to create multiple versions, but we’ll get to that later. Once you’ve closed this Google notebook, this will all go.
All these files will disappear. Make sure you check output to drive and that will save it to your Google Drive and just run that cell. So you can see here, the output path is content drive, my drive, Laura output. So there’ll be a folder on your Google Drive called Laura, and it will be an output file. We’re getting to the most important settings here. So we want to keep the train repeats to 10. Got the instance token. I’m just going to keep mine at mksks. Now you will see random names sometimes like sks. This is because it’s not a name that Stable Diffusion associates with something, so it’s not going to call it up. So by associating M KSKS with my model, it knows it’s calling up my model, my image. I’m going to keep that as is. If you’re not sure, just keep it as M KSKS style. So we are not training a style. We are training a woman. Or you can put person. I actually prefer to put person. You can put woman. It’s up to your own discretion if you want to do that. Resolution, we’re doing 512 by 512 because we have input images that are 512 by 512.
If you’re doing 7 6 8, put 7 6 8 here, just change it up the slider. Just leaving all these settings here as default, and I’m just going to run that cell. So we come down to 5.3, Lauren Optimisation Config, but you really need to experiment with the settings yourself to see if you can get a better result because obviously you are training different images than I am. But however, I will give you my settings because I have done a lot of tests. Come down to the Convolution DIM, which I’m going to be setting quite low at eight, and the Convolution Alpha, I’m going to be setting at one. Then we come down to network dim, which I’m going to set at 16, and then I’m going to change the network alpha to eight. These settings actually have huge influence on your model. I used to do the settings at one, two, eight by one, two, eight, but I’ve played around and I quite like these settings for my realistic models. What settings might work for me might not work for you guys because of different training sets, different resolutions and all that. But I digress.
Okay, I’m going to leave the optimiser config as adding W 8 bit. So the first learning rate, I’m going to change to five, E 4. So the text encoder learning rate, I’m going to change to 1E4. And then the learning rate scheduler, I’m going to change to CoSine with restarts. The warm up steps, I’m going to do 0.05. And to be honest, I’m quite happy with that. So this is probably going to be a learning rate of about 950 steps. But we’ll see once we hit run. So we’re going to run that cell, and then we’re going to go to 5.4 training config. I’m going to leave low RAM on. I’m going to enable sample prompt. I’m going to leave the sampler as DTM. Noise offset, I’m going to leave at zero. Sometimes I go 0.01. I’m going to be creating 10 Epochs here, which will save a file at every learning stage, which means I can test the files out in my web UI at the end to see if it’s either undercooked or overcooked or just about right. I like to do about 10 because it gives me a nice, diverse range to pull from.
The trained batch sizes. Now, you can go quite low. You can go to one. I’m probably going to go to two and see how it goes from there. So the batch sizes is how many files it’s training together. If I’m training six, it’s going to be a lot quicker than it will be for two. If I went to one, I’d probably completely run out of RAM. So if you do have a RAM issue, try sticking to six or higher. But if you don’t have any RAM issues whatsoever, you can train on anything as low as one here. The mixed and saved precision, I’m both leaving those at F P 16. My Epoch, I’m going to save every Epox. So that’s 10 Epox I should have at the end. I’m saving the model as a saved tensers model, and I’m leaving this all as default here, so that’s pretty simple. I’m going to run that cell. Now we come to our final cell. You’ll be glad to hear, all you need to do, just run that cell and leave everything as default and let the training begin. This might take probably about 30 to 40 minutes. If I wanted it to be done quicker, I would actually increase the batch size.
Hopefully, all this makes sense. I wanted to describe what I’m doing as I do it, so you have at least a understanding of what’s going on, which hopefully, again, will allow you to make changes to suit your training data. Once the training is complete, you do not have to do any of the remaining cells in the notebook. Your files will now be saved automatically into your Google Drive. So head over to your Google Drive, you will have a Lo ra file in there, an output file, and in there lives your Lo ra files. And remember, I said it would save a file at every training step, and we said 10 in this demonstration, so it’s given us 10 files here. As you’re probably aware, I use automatic 111 on Run Pod, and the link for instructions are all here. So if you don’t want to use automatic 111 locally on your computer and you don’t want to have to set up a Run Pod like I’ve got, the developer of this Koya Lo ra notebook has just come out with a brand spanking new automatic 111 notebook with control net 1 and the brand new control net 2, as well as the ability to use your newly trained Lora files.
You can use the CalicuristroC lab UI, and it’s basically automatic 111 to generate your images. So I just thought I’d throw that in there as an additional option. Now, grab these files, download them and load them into your stable diffusion model LoRA file. Just whack them all in there. Step three, creating our puppet. Now, underneath the Generate button, you’ll see this sun icon here. Give that a click, and then this will open up this panel along here. Select Laura, and you should see your Laura files now in there. Now, if you don’t, you can always click the refresh button. You can test out all these files here by clicking in on each file. That will then load its tag up into the prompt like this. So you just test them all out, just use one at a time. You can also control the weights of these Laura files as well by adjusting this figure. So I’m just going to load in my LoRA file with a prompt as well as a negative prompt and just run it through and see what it looks like. So I’m quite happy with the overall state of my LoRA file.
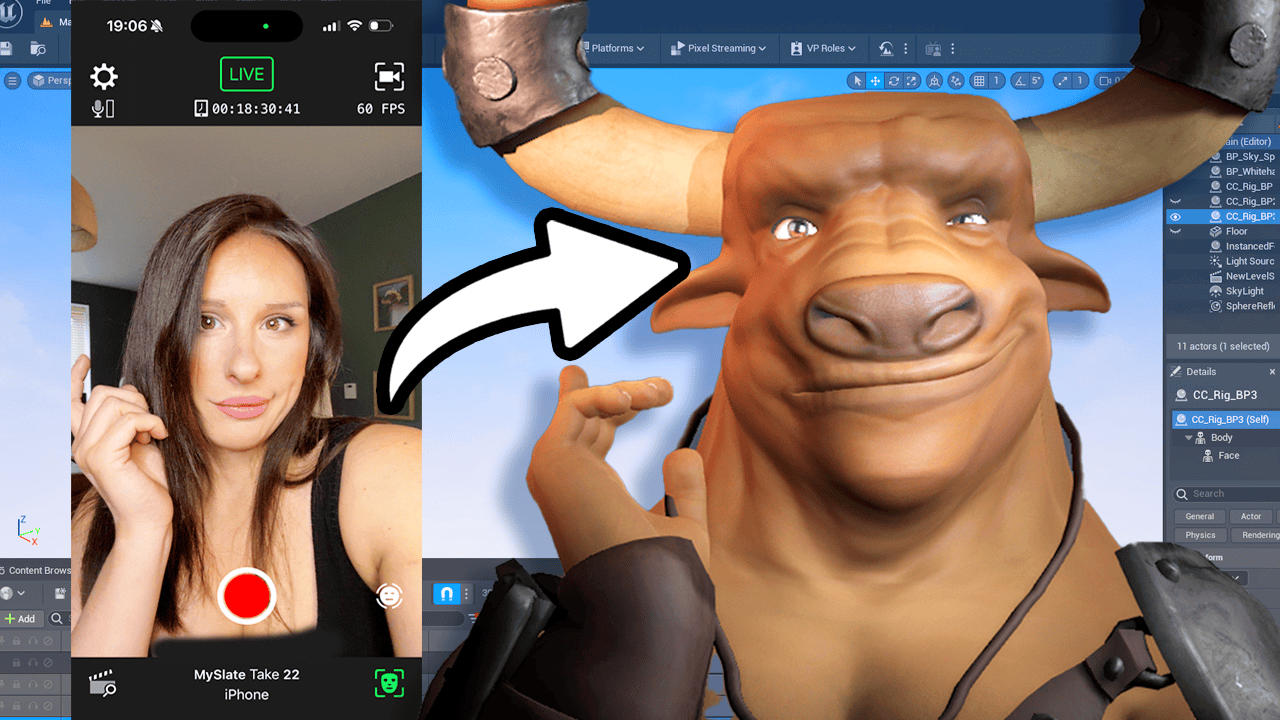
It does look like me. So I’m just going to create an image of me bored. I’m going to be taking this bored image of myself and dragging and dropping that into the Headshot plugin, which then generates me a 3D model of my face. I can go in and sculpt this further if I want to, but I’m just using this as a puppet or a guide for the AI. It doesn’t have to look great. It just has to look similar to me. Once I’m happy with the face and the body shape, I then add some hair. Again, it’s super easy. I’m just dragging and dropping from a library. Now, once I’ve finished with my character, I’m now going to export it to iC loan. These programmes work together in a pipeline. So iC loan is more of an animation programme. So this is where I’m going to be adding the facial animation as well as the body idle. I use a plug in called Motion Live. I just activate Motion Live and I’ve downloaded the Motion Live app on my phone here. All links are below in the description. It’s super easy to use. All you’re doing is recording your facial movement and that’s being applied to your 3D model in real time.
I’ve just dragged and dropped a lighting situation in here and got some physics on the hair and I’m pretty much ready to render. Come over to the render panel, which is here and I’m going to I have selected PNG sequence. I actually went 7 6 8 by 7 6 8 in the end. Try and be visible by 16 if you can. And we come down here and I’m just doing 300 to 500 frames and I’m going to export those as PNG. So we’re going to jump back into automatic 111and I’m going to go through the settings I’m using. I’m using image to image and I’ve loaded in my Laura here. Remember the buttons over here. And then I’ve just added a simple prompt because I don’t want the prompt to fight the original image. That’s quite important. So you want to keep the prompt as brief as possible. Do not put too many details that are not in the image that you want to create. Then we have the negative prompt, which is as important as this prompt up here. So you can copy my one. I’ll put it down in the description below. So this is our rendered image added in here.
So the sampling method I have set to DPM then the SDE. You can use whatever you want. I’ve had good results with Euler A, I’ve had good results with KM Kuhares. Sampling steps, I’m keeping relatively low for this. Width and height, I’m going for 7.68×768, the same as my input. De noising strength, I’m keeping low. I’m keeping the de noising strength at 11. Actually, you’ll notice my CFG scale is down six as well. Again, we want to pull from this image as much as we can and apply the Laura over the top without the prompt compromising things too much. I’ve already set my seed because I’ve tested this out already. When you do this, just render a minus one seed until you get something you like and then lock it in with the Reuse button. So on Control net, I’ve enabled head and I have the model enabled as well. I haven’t changed anything from the default settings here. I’ve got a secondary model in as well, which I’ve enabled canny and enabled the Cany model. Again, I haven’t changed any of the default settings. So let’s render and see what it creates us. That looks like me on a really good day.
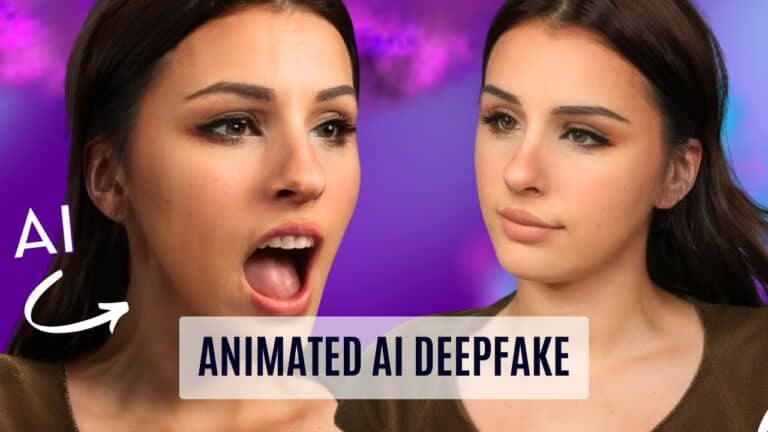
And it’s it’s following the mouth movements as well, which we need for lip syncing. I have seen so much AI generation where the mouth is just a blurry mess. Using my workflow, you can now get precise mouth lip syncing. This is why I made the model on me so you can see that it is working, okay? So we’re now going to batch render these frames, which will give us a frame by frame animation. And to do that, head over to batch and put your input, so where your 3D files are sitting on your drive, and then your output where you want them to render to. And then hit Generate. And congratulations, we have completed our animation. All that is rendering. I want to show you something really cool. And this is why I like this workflow. I literally can come over and switch my checkpoint file and run that again. And look at that. It’s created a semi animation style version with a click of a button. So you can literally change the render type by using your diffusion checkpoint. I think this is really cool. And this is a great starting point from where things are going to go from here.
Now, we’ve got Control net 2, which has just come out, which I’m not using in this video. So that’s going to take things to a whole new another level. So I’ve simply just thrown those frames into After Effects from Automatic 111. If you have Da Vinci Resolve, use the dirt removal and the deflicker times two in there because that will give you really nice smooth results to your animation. I’m going to hit space bar so you can have a look at the animation. I’ve slowed it down so you can see the frames are blending so well into each other. It’s probably not very good animation I did there, but you can see the technique. I switched the checkpoint model over. I didn’t change any of the settings. I’d probably go back in and change some settings to make the animation version smoother. But that shows you how quickly you can flick, essentially, the AI renderer to change. And then that took about two minutes to render those animation frames. I would love to see what you guys make with this workflow. So please tag me in your social media so I can have a look because I love looking through all the creative projects everybody’s doing with AI at the moment.
I put all my AI creative projects and workflows all on my social media as well. On Instagram, I’m @PromptMuse. On Twitter, I’m @PromptMuse. And on Discord, there is a link below. I’m really excited to see what you guys create with this. This tutorial will be written up step by step on the Prompt Muse website as well. And we have a fantastic weekly newsletter that surrounds the latest and greatest in AI tech. So please join that on the Prompt News website. Thank you for watching this video. I really appreciate it if you subscribe to this channel and give it a thumbs up. I do have a buy me a Coffee link down in the description, and that is just to buy me a coffee. I don’t put any content behind any paywalls. I like to make sure that all my content is free and accessible to everybody. And having that allows me to continue to do that. So I thank you very much. This video has been Days in the making because I have had to test out so much stuff and variations to get this to work. So I know you guys appreciate that. Please share this video on your social media and @ me as well when you do it because I like to see that.
That’s amazing and I can say thank you to you as well. So yeah, I think that will do it for today. Bye bye.
