Introduction
In this tutorial, I will show you how to use the Headshot 2 plug-in for Character Creator to create a 3D character from a scanned head mesh. This new plugin from Real Illusion uses AI technology to turn any mesh into a retopgized 3D character, with UVW, rigged mesh and blend shapes for facial animation. There is a full length video of the tutorial here
What you will need
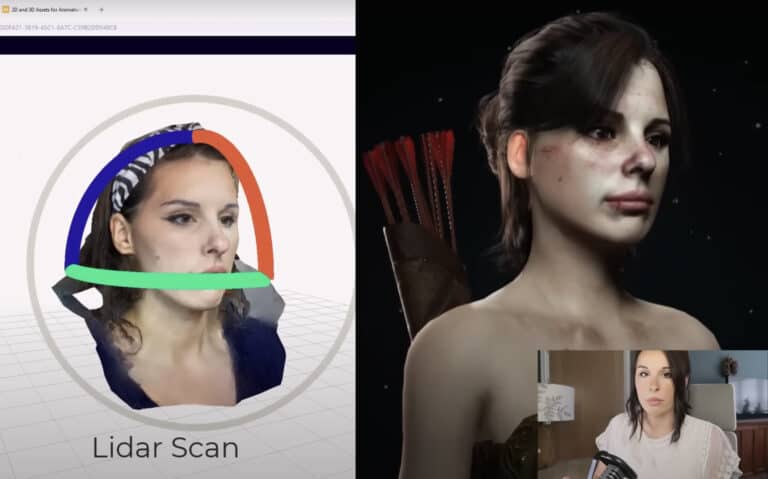
- A head mesh (you can purchase one online or scan your own head) I will be using my own scanned in head using my phone for this tutorial, I used the app Polycam (found on the Appstore) on my IOS phone to scan my head in.
- Headshot 2 plug-in for Character Creator
- Character Creator software
- If you intend to animate my preferable method is Iclone

Step 1: Import the head mesh into Character Creator
- Open Character Creator software.
- Go to File > Import > .obj.
- Select the head .obj mesh file that you want to import.

Step 2: Headshot 2 Plugin
- Click on the Headshot 2 plug-in in the top toolbar. You need to install this prior from the Real Illusion website here.
- The Headshot 2 dialog box will open.
- Click on the Align Points button.
- The starter pins will be automatically placed on the head mesh.
- Move the pins so that they are aligned with the corresponding points on the Character Creator mesh. Delete pins by Ctrl & click the pin you want to remove.
-

Headshot 2 Plugin. Aligning Points

Step 3: Refine the head mesh
- Click on the Head Gen button from the horizontal toolbar.
- A preview of the generated head mesh will be displayed. You can select the area of the mesh you wish to be generated onto the CC3+ model.
- If you are happy with the preview, click on the Generate button, otherwise you can go back and adjust your points.
Step 4: Refine the head mesh
- Use the brushes in the panel to refine the head mesh.
- You can smooth the mesh, move the mesh, or project specific areas.

Step 5: Attach the head mesh to a body
- Click on the Attach to Body button in the Headshot 2 dialog box.
- Select the body type that you want to attach the head mesh to.
- Click on the Attach button.
Step 6: Add skin textures and materials
-
Open the contents dialog.
-
Use the presets in the Skingen plugin to add realism to the skin texture, such as pores, muscle definition and freckles
-
You can also add make up and decals to the character.
-
In the Modify panel, go to the Morphs options and adjust the depth of the eyeballs and height of the teeth using the sliders.

Step 7: Add hair
- I used the hair plugin (hair builder) and additional hairs assets from the Real Illusion marketplace.
Conclusion
This is just a basic tutorial on how to use the Headshot 2 plug-in for Character Creator. There are many more things that you can do with this plug-in, so I encourage you to experiment and explore.
I hope this tutorial is helpful. Please let me know if you have any questions.


