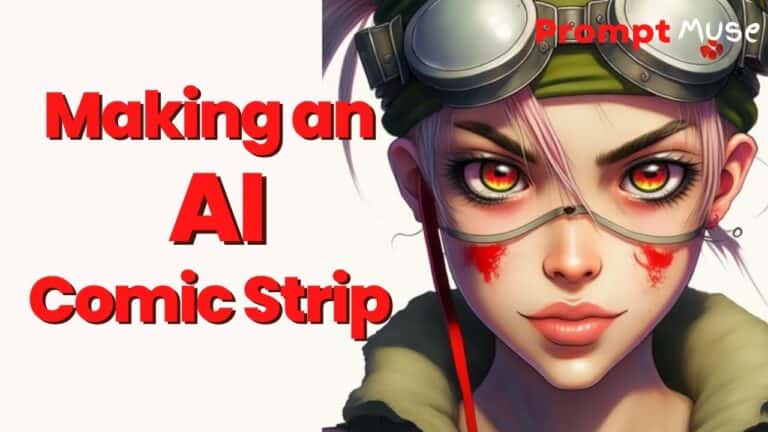
Step 1: Choose your protagonist Choose a photo of yourself or someone else to use as the basis for your protagonist. This will be the character that appears throughout your comic strip.
Step 2: Use Midjourney to create character variations Upload your photo to Midjourney, an AI tool that can generate different versions of your character based on prompts. Use the “Remix” button to adjust the prompts and create different variations of your character. Use the “Reroll” button to create new prompts and variations if you don’t like the results.
Step 3: Create a consistent look for your character Use the seed number to create a consistent look for your character. The seed number is a unique identifier that can recreate a similar image to your original photo. Use this seed number with different prompts to create different emotions, actions, and backgrounds for your character.
Step 4: Upload images to Canva Upload the images created by Midjourney to Canva, a free online design tool. Use Canva to resize and arrange the images, and to add text and other design elements to create your comic strip.
Step 5: Use Darley to fix any image issues Use Darley, an online AI tool, to fix any issues with the images you created in Midjourney. Use the eraser tool to remove parts of the image that you want to reimagine, and then type a prompt to generate a new version of the image.
Step 6: Share your comic strip Share your comic strip on social media or with friends and family. Be sure to tag Prompt Muse on Instagram so they can see your creation!
That’s it! By following these simple steps, you can create a comic strip using AI that is both unique and fun.
FAQ
Q: What is the midjourney prompt generator?
A: The midjourney prompt generator is a program that allows users to create a unique look for comic book characters in just moments. It provides a wide range of features and options to customize the prompts and images generated.
Q: How do I set up my own server on midjourney?
A: To set up your own server, go to midjourney and click on ‘Add Server’. Enter a name such as ‘comic book art’ and you’re ready to go.
Q: How do I specify what type of character I am looking for?
A: You can input keywords such as ‘female comic book hero’ in the prompt to get images of similar characters.
Q: How do I make adjustments to my prompt?
A: With the remix mode, you can make changes and adjustments to suit your needs. You can also upload photos and customize the results.
Q: How do I create an iconic pose for my character?
A: You can create an iconic pose by adjusting the body position and facial expression of your character and considering what type of message you want to convey with the pose.
TL/DR:
Midjourney Prompt Generator is a great tool for comic book artists to create unique characters. Create your own server on the bot and use the remix mode to adjust the prompts generated. Invest in quality references, plan out your story arc, translate the generated prompt into the character, choose colors and assets, add props and accessories, and create an iconic pose to bring your character to life. Following these steps will ensure you have a consistent and memorable comic book character in no time!
Transcript
Welcome back to another prompt music video. Today in this video, I’m going to be showing you how to make a consistent comic book character. Not only is this character consistent, it’s also posable so you can finally make that comic book you’ve always wanted to. But if you know your stuff, head down in the description and you’ll find chapters so you can skip ahead because you are smart enough chat. Let’s get on with the tutorial.
First thing we need to do is head over to midjourney and the website is here. Just log in using the link in my Description and Create account, you can actually create 25 free generations or free images without having to pay anything. But let’s go ahead and connect to the discord. So when you connect to midjourney discord, this is pretty much what you see. It’s a bit of a mess, but if you go over to one of the newbie rooms here, it gets even more messy with loads of people generating their prompts.
What I like to do is create my own server. So I just go over here on the left and click Add Server. And I’m going to go to create my own and for me and my friends, and I’m going to just call this comic book art.
Feel free to add a photo, but I’m not going to do that for this purpose. I’m just going to click on Create and you now have your own room. I’m just going to go back to the midjourney several, which is this little boot icon here. And it doesn’t matter what room you’re in, you just need to find this show members list near to the top. You’ll see this midjourny bot?
If you left mouse click on that midjourny bot and click Add to Server. You can just simply add it to your new server, which mine was comic book art. This brings the prompt generator over to your private room.
I’m just going to click I am a human authorised. And then over here, go back to my new room that I just created. You can see here a mid jellybot just slid into your server. You can’t do this in the newbie rooms, but if you kind of want to hide your photo from everybody and your work, you can do it over here. Bear in mind, this is still in public domain, so it’s not private.
You can add slash private onto the end of your prompt, but that’s going to cost you $20 every time you do that. Only upload photos that you’re comfortable having in a database that you have no control over. Obviously, my face is already out there, so I have no qualms at all with this whatsoever. First thing we need to do is switch to midjourny four and switch the remix feature on, which allows you to edit your prompts after the render. It’s a pretty new cool tool.
To get into your settings, simply type Settings and Return on the keyboard and you can see all the different versions of midjourney and fourth being the latest. So midjourney four is currently in Alpha version so you can’t adjust the aspect ratio because the full version isn’t actually released yet. But I like to use it because it’s really, really powerful and gives me the best renders for my comic book. You might want to consider using midjourney version four if you want to change your aspect ratio. And I believe in test photo and test, you can’t actually upload your own photo.
So today I’m going to be using mid Journey four and it’s highlighted green. If you click on Remix mode, that will activate the Remix feature. The thing we need to do to upload our photo is go to this big white cross and click on that and then click on upload a file from the popup box and then find a photo of yourself. And this is probably the worst photo of myself and I keep using it for these tutorials. But never mind.
If you hit Return twice on your keyboard, that will then create a link and it will be put somewhere on the discord server. So we need to get that link and to do that just click on the image and then right click on the image that it shows you in the middle of the screen. And from the popup box, click Copy image link. So you need to ensure it’s copy Image link that you’re selecting because we need that link or address to where that image is. So that image is now hosted on the server.
So we can now type it into my prompt. So what I want to do now is create a baseline character. So like a hero character using qualities from this photo. So it will probably pull out my dark hair and the blue top I’m wearing. All we need to do is paste our link into our prompt.
So we’ll create our prompt by typing in forward slash imagine and then CTRL V on the keyboard and that will now paste your link. Now I want to make the baseline for my comic book Hero and I need to indicate that it’s female. So I’m going to type in female and then comma and then put Comic Book Hero. So this is going to render four iterations of images. So here you can write anything you want.
I just want a female and a comic book Heroes. So it’s going to give me that as a stylization. That’s a really loose term but you can be more specific. You can type in by a certain artist’s name. There are a tonne of styles that you could use within your comic and here’s some inspiration just to get you started, if you can’t think of any.
But I’m going to keep it nice and simple for this tutorial. I’m going to hit Return on the keyboard and that’s going to create me the four generations. So this is what Mid Journey has given me. It’s given me four iterations based on that image I uploaded. In fact, the photo I uploaded wasn’t best because it kind of blurred out my features slightly with the over exposure.
If you wanted quite specific features, I would use a more detailed image. But here I’m just going for a generalisation. I’m going to go with the iteration number one. So if you look down here, you’ve got U one and U two, three and four and same V one and V two and three and four. The U stands for upscale, so that’s increasing the resolution of the image and the V mean for a variation.
Because we have the Remix button activated, this means that we can adjust the prompt slightly so we can change their hair colour or make the character smile. We’re going to be using that in a minute, but for now, I just want to upscale the iteration one. If you didn’t like any of these versions that my Journey were giving you, you can press this reroll button and that will create the prompt again and just a different seed and variation, so you can hit that as many times as you want. You will also notice it’s pulling the background colour as well, so it will be pulling all the different lighting elements and the colours and the backgrounds from your image that you upload. But we can adjust this in a moment if you stick with me.
This is our hero and we can now make variations, which is the same as this button here, that will enter us into the Remix mode. We can now add Smiling female comic book hero that should now make our character smell. This isn’t a precise at the moment, we are getting to that point, but just bear with the technology because it’s evolving every single day. So we’re kind of a little bit hacking around slightly. But don’t worry, I’m sure it will get to the point where we can actually manually pose our character with an armature, which will be very cool.
For now, we’re kind of just stuck with this, but honestly, it’s changing day by day and if you are not subscribed to the channel, this is a good time to subscribe. So as you can see, that’s now made our main character smile and that’s pretty good. You can tell it’s the same person and so you can actually express expression from your character. So what I’m going to do now is make another variation from that and have her crying with a Burning City in the background. That was pretty much the prompts I used in the comic strip that I showed you at the beginning.
So I’m going to click on make variation and I’m going to put Comma Burning City in background. You could probably get way more creative than I am here, but I just want to keep it simple. For the tutorial, I’m going to put Crying. I know it seems really traumatic, but I couldn’t really think of a storyline and that’s most of the work is thinking of a creative storyline and a character. So pre plan this all out before you get into Mid Journey.
And it’s not a fine art. You have to remember you are the creative director in this. You aren’t the artist. The artist is the algorithm. So you’re pretty much at the mercy of the algorithm here and what it’s going to give you.
You can use prompt engineering to give you better results, but it’s not going to give you the exact results you want. And if you’re thinking about prompt engineering while this is rendering, go to www.promptimuse.com. And I have all different types of prompt engineering or promptcraft that you can use on that page. Anyway, let’s get back to it. As you can see, I’ve got my character now crying, oh, her face is on fire.
See what I mean? It’s not an exact science, but you can see she’s now upset with the Burning City in the background. It’s actually pulling the white through from the original image still. And it’s not really looking that much like me from the original photo. So this is what I do to get it looking more like the original image.
I’ll get the seed from this image and a seed is a unique Identifier, so that will recreate something similar to that image. Not the same, but very similar. So each image created will have a seed. And if you reuse that seed, it will create a more consistent image along the way. I’m going to click on Add Reaction and I’m going to write Envelope and click on this envelope here.
And what that will do is send your seed number to your inbox. So if you go to your inbox or direct messages up at the top here with a little discord symbol. And if I go to Mid Journey Bot, you can see it sent me the seed number for that image. So I’m just going to copy that seed number and then go back to my comic book art server where I was before. And I’m actually just going to paste this into a notepad over here because I’m going to use that in a second.
So I want to go back up here, use the link that was this Identifier for this image here, and I’m going to type in my prompt imagine. And then I’m going to put that original image photo link and I’m going to write Crying Female, Burning City in background. And what I’m going to do is I’m going to now just copy that seed number. You need to put a space between seed and the number. And so this is taking my original photo, giving it a prompt, and then attributing a seed from that image.
So it should be in that style. So this should give me an image closer to my original photo. So as you can see, there’s different paths and ways you can construct an image to be consistent. This is what I like to use to create consistency throughout my comic. So this is what midjourney has now given me with the seed.
So I think this is a really nice combination of the original photo and this character stylization. And you can now use this with any prompt in your comic. Let’s type in a new prompt. Imagine.
And I’m just going to copy the image link. So this is a link to the photo. And I’m going to put female happy, dancing in forest. And then I’m going to add this scene here.
OK. And then we’ll just see what that gives me. But it should give me my consistent character within any scene. So you can see now midjourney has created that same character which is based off my photo in a forest happy and using that same seed. So now we can literally place that character in any action shot with the blue top and the same scraggly hair as mine and create a comic.
It’s that simple. So what I’m going to do now, I did a test on creating different poses using a photograph. So I’ll just go back to uploading an image and I did all these really, really awkward poses. I’m going to choose this one on the phone. I actually found it quite hard to get my journey to do the fingers right for me on the phone using prompts.
So I decided I’d try and do this. I’ll click on the image and then right click copy image link. We did this all at the beginning and then put in the prompt and then type in female. We can use that same feed actually female looking at phonezerning city in background. And then I’m just going to copy that same seed.
So it should give me the same stylization that I’m after but with a different pose. And there you have it, that same character that was in the above images using the seed with the pose of looking at the phone, which is based off that image. So you can see my character is pretty consistent throughout all the images. And you can do different emotions. You can do close up to the eyes.
You can import your own images or your own poses. As you can see here. I actually took a video of myself in all the different poses to I felt really awkward doing this to help with the prompts where it wasn’t getting the pose exactly as I wanted it. So now let’s go over to Canva. So this is Canva.
It’s an absolutely free tool. There’s no need to sign up to the pro package to do this. All you need to do is go to Uploads here on the left hand side and go to Upload files and select the files that you’ve saved from your midjourney project. So you can just simply drag and drop the images into the boxes. You can resize the boxes.
It’s so simple. I don’t think you need a tutorial on it whatsoever, but I can do that if you need it. But there you can see some images that I added to the comic. This is a really rubbish comic, by the way. I’m sure you can do way better than this.
So, yeah, that’s it. There’s no postproduction on there where you can see the hands that have gone wrong or there are certain details that you might not like. You can use the out painting feature in Darley, so that’s kind of postproduction. But I’m going to show you that now while you’re here. So this is Darley and probably the quickest way to fix hands.
You get 50 free credits if you sign up and on the top right hand corner, if you click on that round icon and click on Open Editor, you can upload your images to try and fix them. So click on upload image and I will find go with this one here because the hands are a bit wonky. So you can choose this eraser tool down here and just array part of the image you want to reimagine. And I’m just going to type female holding mobile phone to head and see what that generates. Sometimes the generations are a bit iffy and it also will generate outside this area in all this checkerboard area or reimagine what it thinks should be there.
I don’t really need that because I just want the square image. But you can always crop that down in Canberra. It’s not a problem. So, as you can see, the hands are slightly better. They’re not perfect.
You could probably do a better job in Photoshop, but to be honest, that would do the job absolutely fine. So I’m just going to click Accept on that. If you don’t like the generation, you can press cancel and just reroll again and that will give you another set of variations. But that will cost you credits. So click Accept and I think I’m down to zero credits now.
Again, it’s not my account, it’s my brother’s. Sorry about that. But you can see you can get a bit of a better fix to the hands and it’s not perfect. If you know how to use Photoshop, I suggest going in there and doing it in there. But this video was not about postproduction, this was about creating a quick comic strip book for fun and just to test ideas around it.
There’s no way how I would do it professionally, but this just shows you how the development of the algorithm can speed up the art process massively. And that might be a good thing and that might be a bad thing. I’d love to know your opinions in the comments below. I’ve also got a website with prompt crafting on as well so that gets into more detail about how to get the best out of your prompts. I have not shown that really in this video because I wanted to keep it nice and light and simple.
But if you go over to promptmuse.com, you will also see a directory of all different generators, as well as all my tutorials in written format. I’m currently updating that at the moment, so there’s loads more information to go on there. And if there’s anything you think I should add or I’m missing, please email me and let me know, because I would like to make this a place for our community and hopefully at some point put a forum on there. But thank you so much for watching this video. I hope it has helped you and maybe giving you the confidence to use AI because it’s so simple.
Guys, if you can use Google, you can use this. I would love to see your comic strips as well. So if you want to send them to me, just go to prompt, muse on Instagram and just send me a DM. And I’d love to see what you’ve created with using this technique. There are so many different techniques out there, but this is the one I’ve chosen to show you today and I hope it works well.
Thanks very much and that will do it. Bye.
