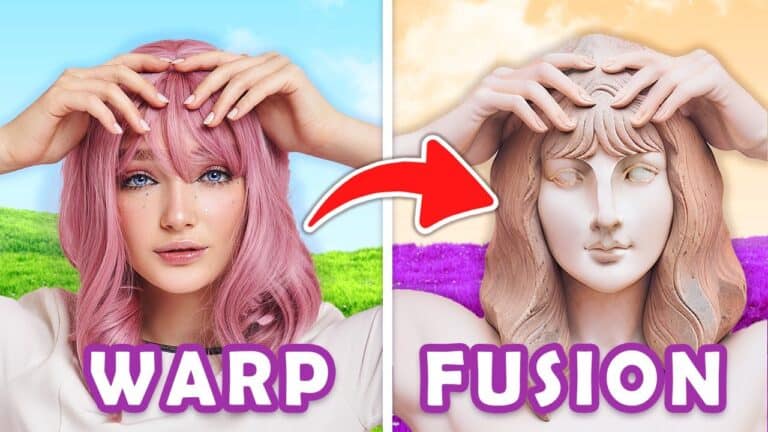
Warp Fusion is an innovative AI animation tool that allows you to create stunning, eye-catching videos. This tool has been gaining popularity for its ability to create unique animations with a consistent theme or style. This tutorial will guide you through the process of using Warp Fusion, focusing on using a remote GPU, which is a preferred method for many as it allows for running multiple GPUs simultaneously, freeing up your PC for other projects.
Getting Started with Warp Fusion
Prerequisites
Before we dive into the tutorial, there are a few prerequisites you need to have:
- Google Colab Pro or Google Colab Pro Plus
- Access to Alex’s Patreon page where you can get the Warp Fusion notebook
- A model and a Lora from Civic AI
Setting Up Warp Fusion
The first step in using Warp Fusion is setting up the environment. This involves downloading the Warp Fusion notebook from Alex’s Patreon page and loading it into your Google Colab. Once you have the notebook ready, you need to connect it to a hosted runtime if you’re using Google Colab Pro. This ensures that you’re using your compute unit and the GPU.
Configuring Warp Fusion
Basic Settings
Once your environment is set up, you can start configuring Warp Fusion. The first thing you need to do is specify the name of the folder where your output files will be stored in your Google Drive. You also need to set the width and height of your output video to match your input video. A resolution of 720 by 1280 is a good starting point, but you can adjust this to suit your needs.
Video Input Settings
Next, you need to specify the path to your input video. This is the video that you want to animate using Warp Fusion. You can save your input video on your Google Drive for easy access. If your video is long and you want to reduce the diffusion time, you can set the ‘extra frame’ setting to two, which means Warp Fusion will diffuse every other frame.
Video Masking
Video masking is a useful feature that can help make the background of your animation consistent and stable. You can use your input video as the mask source and extract the background mask. If you want to add another video into the background, you can specify the path to that video in the ‘mask video path’ setting.
Defining SD and K Functions
The next step is to define the SD and K functions. You need to change the ‘load to’ setting to GPU and specify the path to the model you want to use. You can get models from Civic AI or Hugging Face. You also need to specify the directory where your control net models will be stored on your Google Drive.
Running Warp Fusion
Once you have all your settings configured, you can start running Warp Fusion. This involves running all the cells in the notebook up to the GUI section. This process can take about 5 to 10 minutes, and you will get a green tick for every cell that has successfully completed.
Customizing Your Animation
Using Prompts and Loras
Prompts and Loras are powerful features that can help you customize your animation. Prompts are instructions that guide the AI in creating the animation, while Loras are elements that you can add to your animation. You can specify your prompts and Loras in the GUI section of the notebook. You can also adjust the strength of the stylization and the prompt guidance to achieve the desired effect.
Using Control Nets
Control nets are models that you can use to control the animation. You can select the control net models you want to use and adjust their weights to influence their impact on the animation.
Using the Warp Tab
The warp taballows you to adjust the flow blend of your animation. This is the blending of your input video with the next frame of stylization. If you find that your animation is over-stylized, you can reduce the flow blend to achieve a more balanced effect.
Using the Mask Tab
The mask tab allows you to use a background mask for your animation. You can change the color or use an image or the original video as the background. This can help to create a more consistent and stable background for your animation.
Rendering Your Animation
Once you have customized your animation, you can start rendering it. This involves running the ‘diffuse’ cell in the notebook. As your animation progresses, you will see a preview frame that allows you to check for any errors. If there are errors or things you want to fix, you can stop the diffusion and adjust your settings.
Creating a Video from Your Animation
After your animation has been rendered, you can create a video from it by running the ‘Create Video’ cell. This will create a video from the frames that were diffused in the previous step. The video and all the frames will be saved to your Google Drive.
Post-Production
After you have created your video, you can bring the frames into a post-production software like DaVinci Resolve or After Effects for further editing. This can involve reducing the flickering of the animation or exporting the frames into a .mov file.
Upscaling Your Video
The final step in the process is upscaling your video. This can be done using a service like Topaz Labs or Pixel. These services use AI to increase the size of the video and make it sharper. Pixel is a browser-based service that is easy to use and offers a pay-as-you-go pricing model, making it a cost-effective alternative to Topaz Labs.
Warp Fusion is a powerful tool that allows you to create unique and eye-catching animations. With its wide range of features and customization options, you can create animations that truly stand out. Whether you’re a hobbyist or a professional, Warp Fusion offers a fun and innovative way to create animations.
Remember to share your creations on social media and tag Prompt Muse. We love to see what you create with Warp Fusion. Happy prompting!


