In today’s video, we will be animating static AI images using a trained model. This means you can create your own AI actor or actress and make your own music videos or create your own TikTok influencer. This technology is very new and is evolving, so it might not look perfect yet, but we’re right at the beginning of something very exciting. In this tutorial, we will be using Google Collab Pro to connect to a remote GPU and create animations from anywhere. All resources for this tutorial are available for free on the Pumptime Use website. Don’t forget to subscribe to our channel and hit the notification bell to stay up to date on our latest videos. Let’s get started!
RESOURCES: Download my model from video HERE
Steps
1. Download Google Collab Pro and Connect to a Remote GPU: Download Google Collab Pro and connect to a remote GPU in order to access the resources needed for the animation.
2. Download Model File: If you don’t have your own trained model, you can download my model file from the Pumptime Use website for free.
3. Connect Your Google Drive: Connect your Google Drive to the notebook by running the first cell and logging in.
4. Install Automatic One-on-One Repo: Run the cell to install all of the necessary packages and dependencies required for you to animate your AI images.
5. Select Model Version and Resolution: If you are not using a trained model, select Stable Diffusion 1.5 or 2.1 and whichever resolution best suits your project (512, 768, etc.). If you are using a trained model, paste the path to CKPT file in the notebook and select it from your Google Drive folder.
6. Start Stable Diffusion: Run the cell to start Stable Diffusion and generate a link for you to access your UI either on your local URL or on Gradio app.
FAQ
Q. What is AI animation?
A. AI animation is the process of animating static images using a trained model. This means that you can create your own AI actor or actress and make your own music videos or create your own TikTok influencer.
Q. What do I need to animate AI images?
A. To animate AI images, you will need a driving video, which is a video of you doing some disturbing actions, and a trained model (or you can use the default Stable Diffusion). You will also need Google Collab Pro to connect to a remote GPU and create animations from anywhere.
Q. Are there any resources available?
A. Yes, all resources for this tutorial are available for free on the Pumptime Use website. You can also download my model from the video here.
Q: What is the tutorial about?
A: The tutorial is about animating static AI images using a trained model. This means you can create your own AI actor or actress and make your own music videos or create your own TikTok influencer.
Q: What resources are needed for the tutorial?
A: You will need a trained model and if you don’t have a trained model, you can just use the default stable diffusion. You will also need a driving video, which is a video of you doing some disturbing actions. All resources for this tutorial are available for free on the Pumptime Use website.
Q: What do I need to do to connect my Google Drive?
A: You will need to run the first cell in the Google Collab notebook and this will ask for you to connect to your Google Drive and just click Run anyway and connect to Google Drive. It will then ask you to log in. Once you’ve got a green tick, you can move on to the next cell.
Transcript:
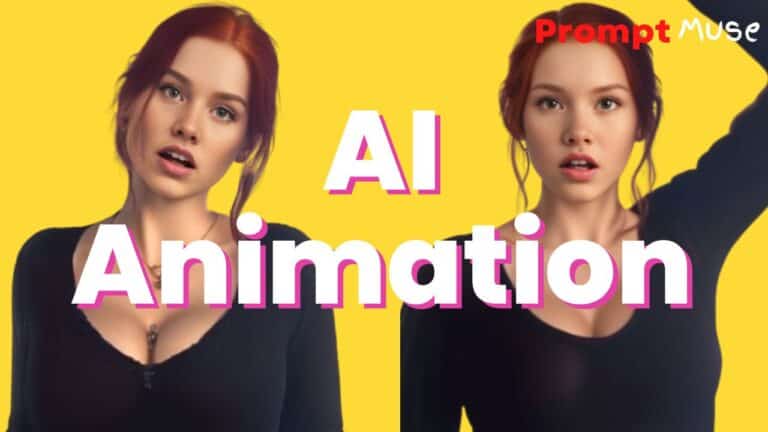
Today. We are not happy with the static AI images. We are going to animate them. What’s more, we’re going to animate them on a trained model. This means you can create your own AI actor or actress and make your own music videos or create your own TikTok influencer.
Let’s not get ahead of ourselves. This technology is very new and is evolving. So it might not look perfect yet, but we’re right at the very start. All started with this humble midjourney vendor and then I took it into something called Dream Booth and it created a trained model, which means I can now create this character into any pose or position. And we don’t want to stop there.
We want to be able to animate this character, which means that the consistency as well as the poses are a lot more dynamic. To do this tutorial, you need a driving video, which is a video of you doing some disturbing actions. Also you will need a trained model and if you don’t have a trained model, you can just use the default stable diffusion or you can use my trained model which is available to download off my website here for free. You know I’m good to you. I also have an alternative method of animation and that will be in the next video.
But I want to show you both ways that are really cool. In this tutorial I’m going to be using Google Collab Pro and what this allows me to do is use a remote GPU that is far, far superior than my rubbish computer. What’s also great about this method, I can connect from my iPad and start creating animations from absolutely anywhere. This tutorial is available on the Pumptime Use website for absolutely free in written format as well. All my resources are free.
What I do ask of you is if you could subscribe to this channel like and ring the notification bell, that helps me out massively. First method I’m going to show you is the image to image. We’re going to be using the automatic one one one web UI and you’ve probably seen a lot of these tutorials online where they’re doing it locally. I’m going to be doing it remotely. So let’s get ready and do the first tutorial.
When you open a Google Collab notebook, this is what it looks like. So the first thing you want to do is connect your Google Drive and log in. So we connect our Google Drive by running this first cell here. And when I say Run, you are just clicking on this play button and this will ask for you to connect to your Google Drive and just click Run anyway and connect to Google Drive. It will then ask you to log in.
This just connects your Google Drive into the file structure over here by clicking this file and you will be able to see your Google Drive once that’s done. If I come up here to refresh and go to content, you will see something called G Drive. That’s your Google drive and my drive. And these are all my saved files on my Google Drive currently. I’m just going to close that for the time being.
That has successfully connected because I have a green tick. Once you’ve got a green tick, you can move on to the next cell. Just click play. And this will install automatic one on one repo. It’s essentially just installing all the governs that you need to run this.
It’s not installing it on your PC. It’s all remote. Once this session is over, your Google Drive will disconnect and all this information, it will all disappear. Once you’ve got your green tick, we’re going to move on to the requirements. And again, just play that cell and that will take a few seconds.
We move down to the model download load section. And before we run this, we just want to make a couple of changes. If you have not created a model and you don’t have a file to upload, do not worry, we can just run stable diffusion as normal. You can use 1.5, or if you press that, you get a drop down window. You can select the latest version, which is version 2.1.
And with version 2.1, you have different resolutions. You’ve got 512 and seven, six, eight. So whichever one suits your project the best. Now, if you do have a model or you’re using my Redhead CKTP file, you come down here where it says Path to CKPT. This is where we’re going to load in our Redhead model file.
And this is sat on our Google Drive currently. I’ve put that there. You can save yours to your Google Drive as well and just click on this folder and navigate back to your Google Drive and then find the model redhead. CKTP file. If you are very neat with your structures, you could put it in your AI folder and in models they should technically all live there.
But I’m quite lazy with my hierarchy. Shoot me. So if we press on the three dots here and go to copy Path, and then we’re going to copy that path by pasting that in. Now you don’t need to touch anything else that’s good to go. We’re going to hit run on that cell and that’s now going to load in our model.
So once that has successfully run, you’ll get this text down here saying using the train model, which is great. The next section is the start stable diffusion. And this is the last section. And then our UI will be ready. I am just going to leave it on model version, stable diffusion 1.5.
And I’m going to use the Gradio server. So I’m going to cheque this checkbox here and that’s it. We just hit play on that cell. And one word of warning is the cell will continue to run. This is going to be the engine for our UI.
Do not close this browser down at all because that will stop your UI running. So this wall consistently runs. You will not get a green tick. What you will get down here when it’s finished loading is a link to your local path or to the Gradio app where you’re going to be running the UI from. This takes a few minutes to complete, so go and grab a cup of tea and come back and it will be ready.
Once it’s complete, you’ll be getting these two links. You can run it on your local URL or you can run it on a public URL. If you click on either link, I’m running it on the gradient app. It will load up your UI. And you might have seen this UI when people are running it locally, it’s pretty much the same.
If you go to the top left hand corner, we can see our model we’re using. There is the redhead CKPT. That’s loaded in nicely. If you’re not using a model, it will have stable diffusion. One five or two one whatever one you chose.
If we look down here, we’re not going to be using the text to image. We’re actually using the second tab along, which is the image to image. So click on that. And then here we’ve got where we’re going to write our prompt. So what stylization do we want on our animation?
First, I’m just going to load in the first frame of our animation. We’re using our image split out into frames. So I’m just going to click on there and I’m going to select the first frame of our animation, which is this one here. I’m going to write in my prompt. I’ve just written any old prompt in here, but one of the most important features here is that I’ve put painting of ZWX person.
So it’s that ZWX is the trigger to my model to create the Redhead character that I trained my model on. Without that, it won’t give me such a consistent character. You can put whatever you want in the pump. Just if you’re using a model, just remember the word that you trained it on in the instances way back in Dream Booth. So the negative means anything I don’t want to see in the animation.
So I’ve just put the usual blurry, blown out, dust, blood. You can put maximalism whatever you want to put or whatever you don’t want to see in the animation. Pop it in here. It’s going to be a negative. So don’t put no, just put the words you don’t want to see.
So we’ve got our first frame, and if we just come down quickly and have a look at our parameters, so we’ve got the sampling steps. So that’s how long it takes to render each frame and in how much quality you want in each frame and the detail. So the higher the more detail and quality you’ll get. Per frame, but the longer it will take for you to render that frame. So I like to go up to about 100 because I’m using a remote GPU and it can handle that.
Let’s go for 100. So the sampling message is how your image is decoded. I personally like euler a you can have a go yourself and just try different ones. But for this tutorial, I’m going to be using Euler A, the width and the height. So the width and the height of your output file.
So my input file is four, four, eight, and I think it was seven, six, eight. My memory serves me. So that’s the size of my input and that will be the size of my output. So they’re going to match, there’s not going to be any distortion. Restore Faces so I’m going to cheque the restore face box and if you come up here on your top tab, you can see settings and you click on that and we can see in the middle here in the column, face restoration.
So you liked a different facial restoration or load your own in. You can use a DFP gan or code, former or none at all. And you can control the weight of the facial restoration. Zero being maximum effect, one being a minimal effect. So sometimes the facial restorers can, especially on a train model, make them not look so much like the model anymore.
So you just want to get a nice balance there and click on Apply Settings and then go back to your Image to Image tab and we’ll continue with the parameters. So the batch count is how many folders that you have in this batch, I’m going to just create one. You can create multiple, but for this I’m just creating one. The CFG scale is how much you want the image or the output image to conform to the prompt. So the higher the number, the more it will conform to the prompt.
The lower the number, the more creative results you will get. Denoising is another very important parameter. If you set it on zero, nothing is going to change. Your output will look like your input and we don’t want that. So you want to have a nice medium.
I think 0.5 is usually a nice medium. For that. You can go a bit lower if you go too high. I think it takes away from animation. I think a 0.5 is a nice balance here, but you can have a play around and see what you like.
So it combines a little bit of the input and merges it with your model as well as your prompt. Now we come down to the seed. Minus one means it’s going to create or reroll us a new seed. If you’ve got a seed that you’re using, you can put it in here. But it doesn’t matter because we’re just going to see if we can get an image we like.
And once we get the image we like, by generating the first frame, we will save that seed and reuse it using this button, or copying and pasting it in here. With all that done, we’re just going to generate one frame and see if we like the results. This is the result of our parameters and our prompt, and it looks quite good. If you look down here, you can see the seed, but you can also press this button, which means reuse the seed, and it will pop your seed for that image down there. So if you hit Generate again, it will just generate the same image which we want for our animation.
So what you can do is change your prompt or your parameters if you don’t like that, and set that back to minus one and regenerate a different image. What I’m going to do now is just load in another frame and just make sure that’s consistent. So I’m going to click on another frame. I mean, this is not a very dynamic animation. I’m sure yours will be a lot better.
And I’m going to click Generate again and that’s going to use the same seed. Hypothetically, it should look the same as that. And there it does looks great. So it looks very consistent from the first frame. And then just pick a couple and just try it out.
So once you’re happy with the overall output of your image, if you just head over to Batch Image to Image, this is where we’re going to set up the output and the input of our animation. And we’re just going to put the input directory, which is the frames that we’re inputting. So if you go over to your first Stable Diffusion tab over on your browser, let’s open up the Google Drive to get our input files. I’ve already made a folder on my Google Drive with my frames in it, so I’m just going to expand that. And these are all my frames.
I’m going to press the free dots and copy Path and come back to my Stable Diffusion, and then just paste that path into the input directory so it knows where to look for those frames. Now, if you want to create an output folder, go back to my Google Drive and let’s say I’m just going to put it in out, and then click on the three dots Copy Path, and then go back to your Stable Diffusion and paste that into your Output folder. Super easy. And your settings are all carried across from your previous image to Image. And all you need to do now is press Generate.
It will now save those frames into your Google Drive. So I just took my output files and imported them into After Effects and compiled everything together and removed the background. And this is what I got. And then the next test I did was a low resolution about lighting video of my face just to see what the model looked like. And I guess when you guys come round to it, you would have a much better set up than I did.
So you can see what is achievable in a few minutes worth of work. It’s pretty cool. So my conclusion to this video is using my technique of using a model and then putting it through imageto image and controlling it with prompts and specific parameters, you get a really nice animation. Now, there are a few artefacts and I’ve got a way to get rid of them. You may have heard of this programme called EB synth.
We can simply run the first frame of your input, which was this frame, and then the first frame of your output, which is this frame, and run it through EBF. You get rid of those artefacts in the animation. Now, you can comp this all together in after effects and get a really, really good outcome. And I’d love to see what you guys create, because you’re going to do something way more creative than I have. Thank you so much for watching.
This is video. And yeah, that will do it. Until next time. Goodbye.


