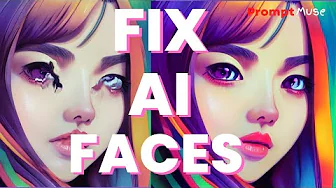
Have you ever taken a mid-journey photo using AI-generated art only to find your image looking like a wonky mess? Fear not, we’ve got you covered. In this guide, we’ll show you three methods to fix those facial features, smooth out skin and achieve a more harmonious image.
Method One: Arc by Tencent
Arc by Tencent is a simple and free inner browser app that can be used without an account or any registration. Follow these steps to use it:
- Navigate to Arc and hit the “Upload” button.
- Select the AI-generated image that you want to fix from your files. The upload process may take some time to complete.
- Use the app’s “before and after” feature to adjust the settings until you’re happy with the outcome.
- Click the “Download” button to retrieve the finished image.
Note: This method may not be suitable for illustrative or textured images, as it makes them appear photorealistic.
Method Two: Gfpgon
Gfpgon is a program that can be run on Google Collab. It’s free to use and can be accessed via your Google Drive account. Here’s how to use it:
- Go to Gfpgon and click on “Connect”.
- Complete each of the five steps by clicking the “Play” button next to each one.
- Wait for the upload to complete.
- Click on “Visualise” to see the finished image.
- Click on “Download Results” to download the final image.
Note: This method is slightly more complicated and requires a Google account to use. However, it produces high-quality results.
Method Three: Using Photoshop
If you’re a Photoshop user, this method may be the most familiar to you. However, it’s also the most time-consuming and requires a subscription. Here’s how to use Photoshop to fix your AI-generated images:
- Open the image in Photoshop.
- Use the brush tool to paint over the facial features that need fixing.
- Adjust the brush size and opacity as necessary to get the desired effect.
- Save the image and compare it to the original.
Note: This method provides the most control over the final image, but may not be the most accessible for everyone.
So there you have it, three methods to help fix those mid-journey AI-generated images. Whether you use Arc by Tencent, Gfpgon, or Photoshop, you’ll be able to achieve a more harmonious image in no time. Experiment with these methods to see which one works best for you. Let us know in the comments which one you prefer!
Transcript
Hello and welcome back to another prompt news video. Today I’m going to be showing you how to fix those midjourney junky faces. This also works for darley output images and stable defusion. Well, essentially any AI generated art. So come along and I’ll show you how to fix those with wonky eyes and funny noses.
So, the first method we are going to be using is Arc by Tencent. It’s an inner browser app and you don’t need to log in, you don’t need to make an account, and you certainly don’t need to pay for anything. So it’s really easy. And let me show you how to use it. So we navigate over to Arc and as you can see, it’s pretty much of a WYSIWYG.
So we’re going to hit upload and find my Janky folder. This image was actually created in midjourney, if you wanted to know. I can’t remember the prompt. It was something about girls flashing and scene. So it takes about 30 seconds for it to load your image in.
Unfortunately, sometimes these in browser apps can be a bit slow because there’s a lot of people using the service. Here we go. And what I like about art, it shows you the before and the after. So you get this little scrolling thing and you can just push it back and forward. And to see the difference that the app is making here now, you can see it’s not only sorting out the facial features, it’s smoothing the skin and giving a colour correction as well.
And I’ve flipped right over. It’s actually getting a ridiculous bit of the shininess on the nose and refining some of the environmental detail. Now, I think that looks quite good. The only thing is that it’s moving and removing any of the textures. So if you’ve got kind of a textured illustrative look, it might not be the programme for you because it’s going to make it kind of photorealistic.
But if you want a quick fix to upload your images to the Instagrams, this is a very quick and easy process. And you just click on download and the job is done and it spits out your image for you. Okay, now to method two. This is called gfpgon, and it’s run on Google collapse. Please don’t be intimidated by the user interface.
It’s very easy to use. What’s really cool about Gspg is that you can actually save and run it from your Google Drive and make modifications to the app. All you need is a Google account. But for now, I’m not going to be doing that. I’m just going to click Connect here and then that will connect you.
There are five steps in total and you just click the ticks next to them and upload your image. So no talking. Let’s get to it. So we scroll down to step one, preparation. The user interface is showing user executions being run.
But don’t worry about that, you don’t need it. You’re not a programmer. So when you hit the Play button here, what it will do is run the code and you just wait to the bottom until it says 100%. It usually takes about 30 seconds. In fact, it tells you how many seconds it takes.
We’re 100%. Okay, so let’s move on to upload images. And that’s number two. So again, hit the Play button. Now you can select your image from your computer.
So I’m going to go to browse, get my Janky image. It’s important to wait until the Play button has a green text next to it and then you can move on to the next step. So it just takes a minute. I’m just going to have a cup of tea. One thing is to note you can see the progress of your image being uploaded here at the bottom, so you’re not waiting for an infinite amount of time.
Okay, that has now loaded. I’ve got my green tick. Let’s move on to inferring. So find that Play button and hit the Play button again at the bottom. Here we have the progress percentage, so keep an eye on that.
It usually takes up to 40 seconds, so it won’t take long at all. OK, so the next step is to visualise your image. So click the play button. Once again, we’ve only got one step after this. If you scroll down now, you will see your images.
And again, it’s got the comparison between what you put in and what it fits out. So it has a very similar post effect as Arc does. As you can see, it’s created a symmetrical image, a more harmonious image. It has sharpened the image and given a smooth to detected skin, as well as upscale the image slightly. And then the fifth and final step is to hit Play on number five download results and that will download you a lovely zip out of your image.
So our third and final text legal method is using Photoshop. You will require a subscription for this, so it’s not free and you need some skills. So with a quick tutorial on YouTube, you’ll be able to paint the tie no problem, I’m sure. But this is the final technique and I’ve done a really rubbish, don’t judge me by this, but a very quick eye repaint so you can see what you can achieve. Now, personally, I prefer this method out of the frame.
You can create your eye from scratch and ultimately have complete artistic control over your design. Also, you keep the integrity of the original painting. So if it’s done in quite an illustrative style or a loose painting style, you can keep those details. And here is a comparison of the faces across the applications. I’ve got the original, then Arc and then GFP gon, and then two minutes in Photoshop without any colour correction.
So Arc and Gfpg are actually pretty much photorestoration applications, but you can use them to fix up your dodgy AI. I would probably suggest investing some time and knowledge in getting to learn photoshop. Then you can become a master of your own destiny. So that is the free method, the predict of unjunctrifying AI images. If you have a better method, let me know in the comments below and I’ll try those out.
So thank you very much and that will do it. Bye bye.
Oh, yeah. Oh yeah. Always forget this bit. Can you like and subscribe and hit the notification button and I will come out with all video. Okay, thanks.
Bye.


