Guys, it’s here. We finally have AI in a 3D programme. My phone’s gone.
Well, kind of. Let me explain. It takes your primitive objects and your prompts and combines them and creates an AI render to the perspective that you want. Finally here, I cannot tell you countless hours I have spent in midjourney putting the camera angles in place to try and get the perspective right. So imagine that this is the baseline what’s to come. The future for AI rendering is definitely going to be integrated in three D. I mean, Mark Holtz already suggested that they’re working on something that will be released next year. Very, very exciting. Before we dive into the tutorial, I just want to give you a brief overview and show you how powerful this plugin actually is. This plugin now means that we can create AI renders from any perspective. So I’ve quite literally thrown down some very primitive shapes here. And if I just hit Render, I’ve got my prompt already set up there over on the right, and you can see it’s rendered me a train in that perspective with trees behind it. And that is what I’ve asked for in the prompt. The plugin that you need to use is called AI.
Render stable diffusion in blender. And to get hold of this plugin, just go to Blender Market. The link is in my description below. You will need to log in and make an account, but they’re not it’s absolutely free. If you want to support the developer, you can give a donation here. But if you don’t have the money at the moment, you don’t have to pay anything. You can click $0 and then click on Purchase and then once added, go to the car and cheque out and get your download for free. Once you’ve checked out and downloaded that zip, you need to go into Blender and then go on to the top horizontal toolbar and click Edit and then go down to Preferences and then Addons. And on the top horizontal toolbar, click on Install and navigate to the zip file you just downloaded. It should be called AI hyphen render. Okay? And just install the add on. And if you don’t see it straight away, just in the search bar, start Stable and it should come up. Ensure the checkbox has a tick in it. And then if you expand down, you will see sign up for Dream Studio.
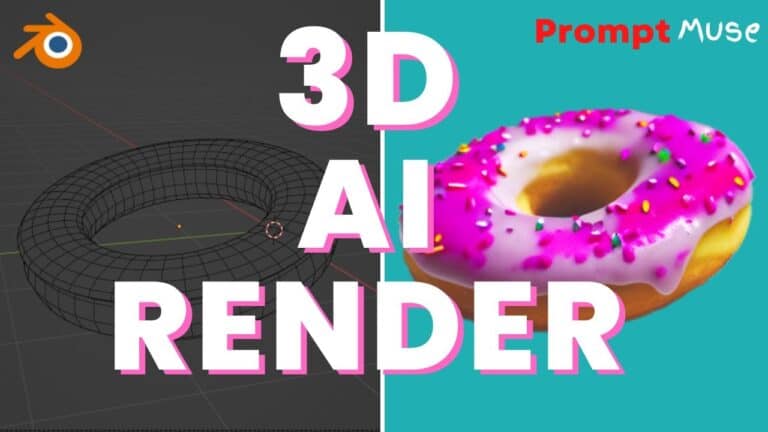
You do need an account, and if you don’t have an account, just create one here by clicking on this button. Once you’ve logged in, if you navigate to the API key and you will want to create an API key, keep this absolutely secret. Just click on Copy and then go back to Blender and you will see the API key section here. If you just paste back in there. And to save all the settings, you just need to go to this hamburger icon down here and click Save Preferences. Okay, so the plug in is now installed. This is a default scene. So I’m just going to click on the cube and hit delete on the keyboard. And then I’m going to hit shift and a and then under Mesh plane, I’m going to put a plane down and just scale it up. She’s gonna scale it later. Bigger than that. I’m going to shift an A once again and under Mesh, go to Taurus. And again, scale that up. I’m just going to move that upwards slightly and then hit zero on my keyboard. So this will give me my camera viewport if I go up here and click on Viewport Shading I want to change the colours of my objects to help the code distinguish each object from one another.
I’m going to click on the Donut and then the material slot and I’m going to create a new colour and I’m going to make it like a kind of brown doughnutty colour and then I’m going to click the plane and again just make it a white colour and that’s it. We’re done. If you go over to render properties. We are now going to enable AI under the AI render tab. If you click on that and then click on the question mark next to the image size, it’s set to 512. X 512 by default. And that’s fine for me because I want to keep the render times low and click. OK, you must do this, otherwise you will get an error message while rendering and then you can see you’ve. Got your prompt down here. So remember, this is based on stable diffusion code. So if you’re used to using dream studio or stable diffusion itself, you can use the same prompts in here, and that should help. Now if you see this lady’s face here if you click on that you will see all the preset styles that are within this plugin. I’m going to use the Product Shop preset and I’m going to give the Donut a description of donut of course with Sprinkle realistic Food Photography eight k and we’re done.
We just head over to render on this top horizontal toolbar and then click Render Image. You can hit the shortcut F twelve if you prefer and we should get a donut so that’s pretty cool. We’ve got a doughnut in that perspective. Now what we can do is if we scroll down here and click on Operations we can create a new image from the last render so if that’s not particularly the donut you wanted you can click on this and what it will do is create you a new render from this rendered image rather than simple geometry. So if we click on that and let’s see what it gives us and it’s given us a pretty realistic donut which is great for over painting or using a stock imagery you will also probably notice that you are in this AI render. So to get back to your geometry. You just click layout and there you go. Press zero again to come out of the camera view and that is that simple. This is a great example of the power of this plug in and how quickly this technology is evolving. As you can see, I’ve made this very rudimental background mountains with a lake and if I hit zero to go in so let’s see what it generates.
So go up to Render and render image and look at that. That is amazing. That has created that from my rudimentary geometry. You can see the direction these plugins are going in, how the evolution of this technology is coming along. As you can see, it’s not exactly there yet, but it definitely is coming. You can’t do 3D animation just yet and as far as I’m aware, you can’t animate from blender. But I know again in the next coming days that should come and of course I will report on it when that does come. Thank you to Ben from AI Renderer for creating this fantastic bridge plugin. If you like this video, hit subscribe and like. If you don’t like this video, hit subscribe and like this is just a quick overview to show you and demonstrate how powerful the baseline of AI within a 3D programme is going to be. I am so, so excited for what’s to come. Because if I haven’t told you before, I used to be a 3D professional artist. So guys, we are nearly on 500 subscribers. We are on 497. So I need to three more subscribers, guys, to get 500.
And that will mean I’ve got 500 subscribers. Okay, thanks. Bye.


